Contents
- Security
- Assessing computer protection status and resolving security issues
- How to fix security issues on your PC
- How to restore a deleted or disinfected file
- Scanning the computer
- Updating anti-virus databases and application modules
- Pre-Kaspersky virus removal
- Weak Settings Scan
- Scanning email messages
- Protection using hardware virtualization
- About protection using Antimalware Scan Interface
- Game mode
Security
Today's hackers are getting smarter in their target to break into your devices. New ransomware, phishing and other malware types call out for new cybersecurity solutions to get you a step ahead the growing threats. We created the new Kaspersky Free application to help you stay on top of today's threats. Find out what you can do to feel secured.
Assessing computer protection status and resolving security issues
Problems with computer protection are symbolized by an indicator located in the upper part of the main application window. Green indicates that your computer is protected. Yellow indicates that there are protection problems and red indicates that your computer's security is at serious risk. You are advised to fix problems and security threats immediately.
You can open the Notification Center window by clicking the Details button in the main application window. This window provides detailed information about the protection status of the computer and suggests possible actions for rectifying problems and threats.
Problems with protection are grouped by categories. For each problem, a list is displayed of actions that you can take to solve the problem.
The Status section displays information about the computer protection status and subscription status. If problems are detected that must be fixed, a Fix button is displayed next to the notification; you can fix security problems by clicking this button.
The Recommendations section lists actions that should be performed to optimize operation of the application and use it more effectively.
The News section displays cybersecurity news.
Clicking the Show N ignored notifications button displays notifications to which the Ignore action has been applied. Ignored notifications do not affect the color of the protection indicator in the main application window.
Page topHow to fix security issues on your PC
To fix security issues on your PC:
- Open the main application window.
- Click on the Details link in the upper part of the main application window to go to the Notification Center window.
- Go to the Status section. This section displays security issues on your PC.
- Select an issue from the list and click an action button, e.g. Fix.
- Select Ignore from the drop-down list if you do not want to fix this issue now. You can view the list of ignored notifications later by clicking the Show N ignored notifications button.
- Go to the Recommendations section. This section displays recommendations that are not mandatory but will help you optimize your usage of the application and better protect your PC.
- Select a suggestion from the list.
- Click the button next to a suggested action; for example, click the Enable button next to the Want to get rid of noisy pop-up ads? suggestion.
- Go to the News section. In this section, you will find cybersecurity news. Use the navigation buttons to read the next news item or to go back to the previous news.
How to restore a deleted or disinfected file
Backup copies of deleted or disinfected files are placed in a special folder on your computer, named Quarantine. Backup copies of files are stored in a special format that is not dangerous to your computer. You can restore deleted or disinfected file from the backup copy stored in Quarantine.
We recommend that you avoid restoring deleted or disinfected files since they may pose a threat to your computer!
The application does not disinfect Windows Store apps. If scanning results indicate that such an app is dangerous, it is deleted from your computer. When a Windows Store app is deleted, Kaspersky Free does not create a backup copy of it. To restore such objects, you must use the recovery tools included with the operating system (for detailed information, see the documentation for the operating system that is installed on your computer) or update apps via the Windows Store.
To restore deleted or disinfected file:
- Open the main application window.
- Go to the Security section.
- In the upper-right corner of the application window, click the Quarantine button.
This opens the Quarantine window.
- In the Quarantine window that opens, select the required file from the list and click the Restore button.
Scanning the computer
During scanning, the application searches for infected files and malware. There are several types of scans that vary in their search duration and scope.
- Full Scan. Scans all areas of the computer. This scan requires a lot of time to complete.
- Quick Scan. Scans objects that are loaded when the operating system starts as well as system memory and boot files. This scan does not require a lot of time to complete.
- Selective Scan. Scans the selected file or folder.
- Removable drives scan. Scan of removable drives, such as hard drives and USB sticks connected to the computer.
- Instant File Scan. This option scans files from the context menu.
- Background Scan. Scan of system memory, the system partition, boot sectors, and startup objects, as well as rootkits search.
- Application Vulnerability Scan. Scan the computer for vulnerabilities in applications that malware can exploit to infect your system.
After you install the application, we recommend that you perform a full scan of your computer.
How to run a Quick Scan
During a quick scan, the application scans the following objects by default:
- Objects loaded at the startup of the operating system;
- System memory
- Disk boot sectors.
To run a Quick Scan:
- Open the main window of the application and perform the following actions:
- Go to Home section, and click the Quick Scan button.
- Go to the Security section.
- In the Scan block, click the Choose scan button.
- This opens the Scan window.
- In the Scan window select the Quick Scan section.
- In the Quick Scan section, click the Run scan button.
The application starts a quick scan of your computer.
Page topHow to run a Full Scan
During a full scan, the application scans the following objects by default:
- System memory
- Objects loaded on operating system startup;
- System backup storage;
- Hard drives and removable drives.
We recommend running a full scan immediately after installing the application to your computer.
To run a Full Scan:
- Open the main window of the application and go to the Security section.
- In the Scan block, click the Choose scan button.
This opens the Scan window.
- In the Scan window select the Full Scan section.
- In the drop-down list next to the Run scan button, select the action to perform when the scan is complete.
- Click Run scan.
The application starts a full scan of your computer.
Page topHow to run a Custom Scan
A Selective Scan lets you scan a file, folder, or drive for viruses and other threats.
To run a Custom Scan:
- Open the main application window.
- Go to the Security section.
- In the Scan block, click the Choose scan button.
This opens the Scan window.
- In the Scan window select the Selective Scan section.
- Click the Select button and specify an object in the file or folder selection window that opens.
- Click Run scan.
How to run a removable drive scan
Removable drives that you connect to the computer may contain viruses or other applications that present a threat. Kaspersky Free scans removable drives to prevent your computer from becoming infected. You can configure a removable drive scan to be started manually or automatically when a removable drive is connected to the computer. Automatic scanning of removable drives is enabled by default.
To run a removable drive scan manually:
- Open the main application window.
- Go to the Security section.
- In the Scan block, click the Choose scan button.
This opens the Scan window.
- In the Scan window select the Removable Drive Scan section.
- In the drop-down list, select the drive letter of the external device and click on the Run scan button.
The application will start scanning the connected device.
Page topHow to run a Context Menu File or Folder Scan
To run a Context Menu File or Folder Scan:
- Right-click on the file or folder that needs to be scanned.
- In the context menu that opens, select Scan for viruses.
The application will start scanning the selected file or folder.
In Microsoft Windows 11, you must expand the context menu of an object to see the application commands.
Page topHow to enable or disable a background scan
A Background scan is an automatic scan mode that does not display notifications. This scan requires fewer computer resources than other types of scans (for example, Full Scan). When in this mode, the application scans the system memory, system volumes, boot sectors and startup objects, and searches for rootkits.
A background scan is started in the following cases:
- After the databases and application modules are updated
- 30 minutes after application launch
- Every six hours.
- If the computer remains idle for five or more minutes (after the screen saver is started).
A background scan is interrupted when any of the following conditions is met:
- The computer becomes active again.
- The computer (laptop) switches to battery mode.
If a background scan has not been performed for over ten days, the scan is not stopped. When running a background scan, the application does not scan files whose contents are located in OneDrive cloud storage.
To enable or disable a background scan:
- Open the main application window.
- Go to the Security section.
- In the Scan block, click the Choose scan button.
This opens the Scan window.
- Click the
 icon in the Background scan block.
This opens the Background scan settings window.
- In the Background scan settings window, switch the toggle to On or Off.
How to create a scan schedule
To create a scan schedule:
- Open the main application window.
- Go to the Security section.
- In the Scan block, click the Choose scan button.
This opens the Scan window.
- In the Scan window, select the type of scan and click the icon.
- In the opened window, click the Scan schedule link to proceed to the Scan schedule window.
- In the Scan schedule window, in the Run scan list, select a period, such as Every day, and specify the time to start the scan.
A scan schedule cannot be created for the Scan from Context Menu or Background Scan.
Page topAbout scanning files in OneDrive cloud storage
In Windows 10 RS3 or later, Kaspersky Free does not scan files in OneDrive cloud storage. If the application detects such files during a scan, it shows a notification stating that the files in cloud storage were not scanned.
The following components do not scan files in OneDrive cloud storage:
- Full Scan
- Selective Scan
- Quick Scan
- Background Scan.
The report on the operation of Kaspersky Free contains a list of files in OneDrive cloud storage that were skipped during scan.
Files downloaded from OneDrive cloud storage to a local computer are scanned by real-time protection components. If a file scan was postponed and the file has been uploaded back to OneDrive cloud storage before the scan is started, this file may be skipped during a scan.
In order to make sure that OneDrive files are displayed in Explorer, turn on the Files on demand in the OneDrive client application feature. If you are connected to the Internet, you can use them just like any other files on your computer.
Page topUpdating anti-virus databases and application modules
This section contains information about database and application module updates.
About updating databases and application modules
The installation package of the application includes databases and application modules. Using these databases:
- The application detects the majority of threats using Kaspersky Security Network, which requires an Internet connection.
- The application detects adware, auto dialers, and other legitimate software that can be used by intruders to damage your computer or personal data.
To get full protection, we recommend updating the anti-virus databases and application modules as soon as the application has been installed.
Databases and application modules are updated in stages:
- The application starts updating databases and application modules according to the specified settings: automatically, on schedule, or on demand. The application contacts an update source that stores a anti-virus databases and application modules update package.
- The application compares the existing databases with the databases available at the update source. If the databases are different, the application downloads the missing parts of the databases.
The application then uses the updated databases and application modules to scan the computer for viruses and other threats.
Update sources
You can use the following update sources:
- Kaspersky update servers
- HTTP or FTP server
- Network folder
Special considerations involved in updating anti-virus databases and application modules
Updates of anti-virus databases and application modules are subject to the following restrictions and specifics:
- Anti-virus databases are considered out of date after one day and extremely out of date after seven days.
- To download an update package from Kaspersky servers, an Internet connection is required.
- Updates of anti-virus databases and application modules are unavailable in the following cases:
- The subscription has expired, and the grace period or limited functionality mode is not available.
- A metered mobile Internet connection is used. This limitation applies on computers running under Microsoft Windows 8 or more recent versions of this operating system if automatic updates or scheduled updates are enabled and a traffic limit has been set for a metered mobile connection. If you want the application to update anti-virus databases and application modules in this case, clear the Limit traffic on metered connections check box in Settings → Security settings → Advanced settings → Network settings.
- The application is used under subscription from a service provider, and you have suspended your subscription on the website of the service provider.
Installing an update package
When an update package (patch) is received, the application installs it automatically. To complete the installation of an update package, you must restart the computer. Until the computer is restarted, the application icon in the notification area is red, and the application Notification Center window displays a prompt to restart the computer.
Page topHow to start an update of databases and application modules
By default, databases and application modules are updated automatically. You do not need to take any action. If automatic updates are disabled, you can update application databases and modules manually.
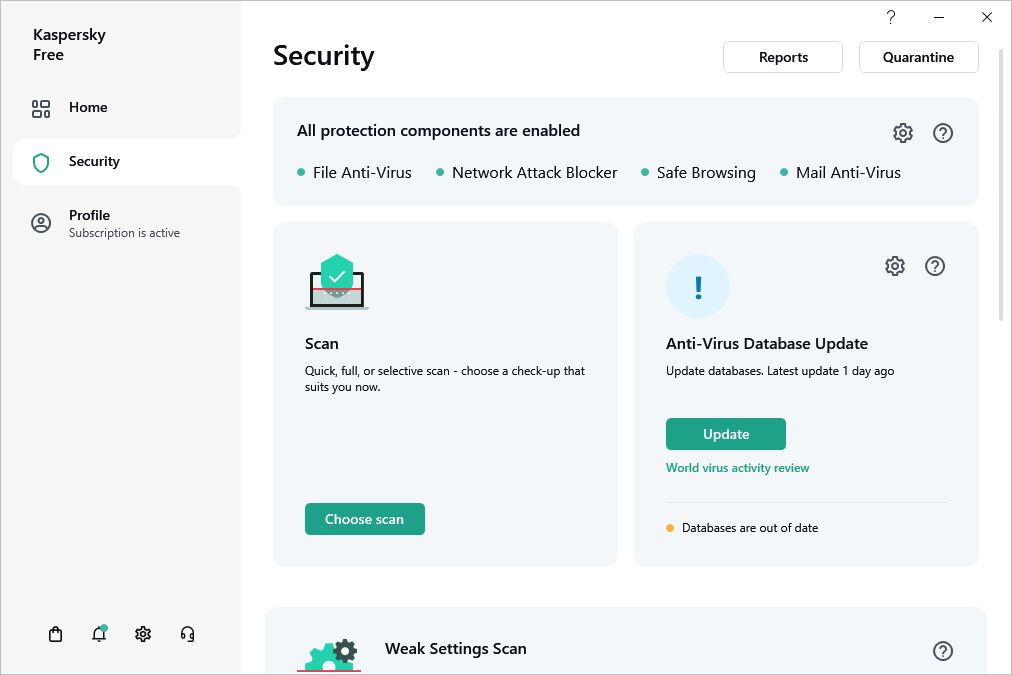
To start an update of databases and application modules:
- Open the main application window.
- Go to the Security section.
- In the Anti-Virus Database Update block, click the Update button.
Anti-Virus Database Update
Pre-Kaspersky virus removal
This section contains information on restoring the operating system after it has been infected with malware.
Recovering the operating system after infection
If you suspect that the operating system of your computer has been corrupted or modified due to malware activity or a system failure, use the Microsoft Windows Troubleshooting Wizard, which clears the system of any traces of malicious objects. Kaspersky recommends that you run the Wizard after the computer has been disinfected to make sure that all threats and damage caused by infections have been fixed.
The Wizard checks whether there are any changes to the system, which can include access to the network being blocked, file name extensions for known formats being changed, Control Panel being blocked, etc. There are different reasons for these different kinds of damage. These reasons may include malware activity, incorrect system configuration, system failures, or malfunctioning applications for system optimization.
After the review is complete, the Wizard analyzes the information to evaluate whether there is system damage that requires immediate attention. Based on the review, the Wizard generates a list of actions that are necessary to eliminate the damage. The Wizard groups these actions by category based on the severity of the problems detected.
Troubleshooting the operating system by using the Microsoft Windows Troubleshooting Wizard
To run the Microsoft Windows Troubleshooting Wizard:
- Open the main application window.
- Go to Security → Microsoft Windows Troubleshooting.
- Click Find damage.
The Microsoft Windows Troubleshooting Wizard window opens.
The Wizard consists of a series of pages (steps), which you can navigate through by clicking the Back and Next buttons. To close the Wizard after it finishes, click the Done button. To stop the Wizard at any stage, click the Cancel button.
Let us review the steps of the Wizard in more detail.
Start recovery of the operating system
- Select one of the two options for Wizard operation:
- Search for damage caused by malware activity. The Wizard will search for problems and possible damages.
- Roll back changes. The Wizard will roll back the fixes applied to previously identified problems and damages.
- Click Next.
Search for problems
If you selected the Search for damage caused by malware activity option, the Wizard searches for problems and possible damages that should be fixed. When the search is complete, the Wizard proceeds automatically to the next step.
Select actions to fix damage
All damage found at the previous step is grouped based on the type of danger that it poses. For each damage group, Kaspersky recommends a set of actions to repair the damage.
There are three groups:
- Strongly recommended actions eliminate problems that pose a serious security threat. You are advised to repair all damage in this group.
- Recommended actions are aimed at repairing damage that may pose a threat. You are also advised to repair damage in this group.
- Additional actions repair operating system damage that is not dangerous now, but may pose a threat to the computer's security in the future.
Expand the list of the selected group to view damage within the group.
To get the Wizard to fix a specific type of damage, select the check box next to the damage description. By default, the Wizard fixes damage belonging to the groups of recommended and strongly recommended actions. If you do not want to fix a specific type of damage, clear the check box next to it.
It is strongly recommended that you not clear the check boxes selected by default, as doing so will leave your computer vulnerable to threats.
After you define the set of actions for the Wizard to perform, click the Next button.
Fix damage
The Wizard performs the actions selected during the previous step. It may take a while to fix damage. After fixing damage, the Wizard automatically proceeds to the next step.
Wizard completion
Click the Done button to exit the Wizard.
Page topOperating system emergency recovery
Kaspersky Rescue Disk is intended for emergency recovery of the operating system. You can use Kaspersky Rescue Disk for scanning and disinfecting infected computer that cannot be disinfected using other methods (for example, with anti-virus applications).
More details on using Kaspersky Rescue Disk are available on the Technical Support website.
Page topWeak Settings Scan
In this section, you will learn about weak operating system settings, and how to search for and fix weak settings in the operating system.
About weak settings of the operating system
When you are working with a computer, operating system settings can be changed as a result of your actions or the actions of applications that you run. Changing the operating system settings can pose a risk to the security of your computer. For example, if automatic sign-in with the current user name and password is enabled in the browser, a third-party website can intercept your password.
Weak settings in the operating system can be divided into two types:
- Critical settings. Such settings are equated with vulnerabilities of the operating system.
- Recommended settings. You are advised to fix these settings to improve the security of the operating system.
By default, the application scans for weak settings of the operating system at least once a day. If the application detects weak settings in the operating system, it prompts you to fix them to restore the security of the operating system. For details about each weak setting, click the link next to the relevant setting in the application window.
You can click the link in the notification window to go to the Weak Settings Scan window that displays the weak settings detected in the operating system. Information about weak settings is also displayed in the Notification Center. You can proceed to view and fix the weak settings from the Notification Center.
In the Weak Settings Scan window, you can perform the following actions:
- Fix weak settings in the operating system.
- Ignore: Leave weak settings of the operating system unchanged.
- Cancel: Restore previously fixed weak settings of the operating system to their original state.
The application identifies weak settings of the operating system for all user accounts on your computer. You can fix weak settings for other user accounts on the computer only if you have logged in to the operating system under an administrator account.
If you are not an administrator of the computer, you can ignore weak settings only for your own user account. Only a computer administrator can ignore weak settings of all user accounts.
You can manually start a scan for weak settings or disable the scan for weak settings.
You can remotely manage the protection of your computer and send a command to fix weak settings from My Kaspersky.
Page topHow to find and fix weak settings in the operating system
To find and fix weak settings of the operating system:
- Open the main application window.
- Select the Security section.
- Under Security, select Weak Settings Scan.
- Click Scan.
This runs a Weak Settings Scan. After the scan is complete, you will see scan results in the Weak Settings Scan section.
- Click View to go to the Weak Settings Scan window.
- In the Weak Settings Scan window, select an action to take on weak settings:
- Detected weak settings. Do one of the following:
- Click the Fix all button to fix all weak settings.
- Click the Fix button to fix a weak setting.
- If open applications are interfering with fixing a weak setting, click the View button to view the list of interfering applications.
To close applications that prevent the setting from getting fixed, do one of the following:
- Click the
 button to the right of the name of the interfering application to shut it down normally. If the application detects any unsaved changes, it will prompt you to save them.
 - Click the Force close link to close all interfering applications without saving data.
- Click the
- In the drop-down list next to the Fix button, select Ignore to leave a weak setting unchanged.
- In the drop-down list next to the Fix button, select Read more to view information about a weak setting on the Kaspersky Technical Support website.
- Previously fixed weak settings.
- Click the Roll back button to restore the fixed setting to its original state.
- In the drop-down list next to the Roll back button, select Read more to view information about a weak setting on the Kaspersky Technical Support website.
- Ignored settings. Click the Show all link next to the N ignored settings message to open the list of weak settings that you left unchanged, and click the Fix button.
- Detected weak settings. Do one of the following:
How to enable Weak Settings Scan
To disable the Weak Settings Scan:
- Open the main application window.
- Click in the lower part of the main window.
This opens the Settings window.
- Go to the Performance settings section.
- Click PC resource consumption.
- Clear the Scan for weak operating system settings check box.
The application will not scan for weak settings of the operating system or show alerts about them.
Page topScanning email messages
Kaspersky Free allows scanning email messages for dangerous objects by using Mail Anti-Virus. Mail Anti-Virus starts when the operating system is started and remains constantly in the RAM of the computer, scanning all email messages that are sent or received over the POP3, SMTP, IMAP, and NNTP protocols, as well as via encrypted connections (SSL) over the POP3, SMTP, and IMAP protocols.
By default, Mail Anti-Virus scans both incoming and outgoing messages.
If no threats are detected in an email message, or if all infected objects have been successfully disinfected, the message becomes available for further access. If the component fails to disinfect an infected object, Mail Anti-Virus renames or deletes the object from the message and adds a notification to the message subject line, stating that the message has been processed by Kaspersky Free. Before deleting an object, Kaspersky Free creates a backup copy of it and places a copy in Quarantine.
If Kaspersky Free detects the password for the archive in the message text during scanning, the password is used to scan the contents of that archive for malware. The password is not saved. The archive is unpacked before scanning. If the application crashes while unpacking the archive, you can manually delete the files that are unpacked at the following path: %systemroot%\temp. The files have the PR prefix.
Page topProtection using hardware virtualization
In this section, you will learn how you can protect your computer using hardware virtualization.
About protection using hardware virtualization
When Kaspersky Free is installed in 64-bit Microsoft Windows 8, Microsoft Windows 8.1 or Microsoft Windows 10, it uses
technology for additional protection against complex malware that could intercept your personal data by using the clipboard or phishing.Protection using hardware virtualization is enabled by default. If protection has been disabled manually, you can enable it in the application settings window.
On computers running 64-bit Microsoft Windows 8, Microsoft Windows 8.1 or Microsoft Windows 10, the protection provided by Kaspersky Free hardware virtualization (hypervisor) has the following limitations:
- This feature is not available when a third-party hypervisor is running, such as the hypervisor used by the VMware virtualization software. After you close the third-party hypervisor, protection against screenshots becomes available again.
- The feature is not available if the CPU of your computer does not support hardware virtualization technology. For more details on whether your CPU supports hardware virtualization, please refer to the documentation shipped with your computer or to the website of the CPU manufacturer.
- The feature is not available if a third-party hypervisor (such as the VMware hypervisor) is running when you start Protected Browser.
- The feature is not available if hardware virtualization is disabled on your computer. For details on how to enable hardware virtualization on your computer, please refer to your computer's technical documentation or visit the website of your processor's manufacturer.
- The feature is not available if Device Guard is enabled in the Microsoft Windows 10 operating system.
- The feature is not available if Virtualization Based Security (VBS) is enabled in the Microsoft Windows 10 operating system.
How to enable protection using hardware virtualization
To enable protection using hardware virtualization:
- Open the main application window.
- Click in the lower part of the main window.
This opens the Settings window.
- Go to Security settings → Privacy settings → Secure Data Input.
- Select the Use hardware virtualization if available check box. This check box is displayed when the application is installed on a 64-bit version of Windows 8, Windows 8.1 and Windows 10.
- Select the Use advanced features of hardware virtualization check box if you want to turn hardware virtualization on when the operating system starts.
If hardware virtualization is disabled on your computer, protection using hardware virtualization will be disabled.
Page topAbout protection using Antimalware Scan Interface
Antimalware Scan Interface (AMSI) allows a third-party application that supports AMSI to send objects (for example, PowerShell scripts) to Kaspersky Free for additional scanning and to receive scan results for these objects. For example, Microsoft Office applications can be such third-party applications. For more information about the AMSI interface, refer to Microsoft documentation.
Antimalware Scan Interface allows only to detect a threat and notify a third-party application about the detected threat. After receiving the threat notification, the third-party application prevents malicious actions (for example, shuts down).
Kaspersky Free may decline a request from a third-party application if, for example, this application exceeds the maximum number of requests allowed for a period. In this case, Kaspersky Free displays a notification about the declined request. If you receive such a notification, you do not have to perform any actions.
Protection using Antimalware Scan Interface is available on Windows 10 Home / Pro / Education / Enterprise and Windows 11 Home / Pro / Enterprise operating systems.
Page topHow to exclude a script from scanning using Antimalware Scan Interface
To exclude a script from scanning using Antimalware Scan Interface:
- Open the main application window.
- Click in the lower part of the main window.
This opens the Settings window.
- Go to Security settings → AMSI Protection.
- In the Script scanner section, select the Scan scripts using Antimalware Scan Interface (AMSI) check box.
- Click the Manage exclusions link to go to the Exclusions window.
- In the Exclusions window, click the Add button.
The Add new exclusion window opens.
- In the File or folder field, specify the folder with the script.
- In the Object field, specify the name of the script.
You can also add several files of the same type to the exclusions by using a mask.
- In the Protection components section, select the check box next to the File Anti-Virus component.
- Select the Active status.
The specified object will not be scanned using Antimalware Scan Interface.
Page topHow to enable protection using Antimalware Scan Interface
To enable protection using Antimalware Scan Interface:
- Open the main application window.
- Click in the lower part of the main window.
This opens the Settings window.
- Go to Security settings → AMSI Protection.
- In the Script scanner section, select the Scan scripts using Antimalware Scan Interface (AMSI) check box.
Game mode
When Kaspersky Free runs in full-screen mode together with some other applications (particularly computer games), the following issues may occur:
- Application or game performance decreases due to lack of system resources;
- Notification windows of Kaspersky Free distract the user from the gaming process.
To avoid changing the settings of Kaspersky Free manually every time you switch to full-screen mode, you can use Game mode. If Game mode is being used and you are playing or working with applications in full-screen mode, Kaspersky Free does not run scan and update tasks and does not display notifications.
To enable Game mode:
- Open the main application window.
- Click in the lower part of the main window.
This opens the Settings window.
- Go to Performance settings → PC resource consumption.
- Select the Game Mode check box.