Contents
- Integration with other solutions
- Integration with Kaspersky Security Center
- Integration with Kaspersky CyberTrace
- Integration with Kaspersky Threat Intelligence Portal
- Integration with R-Vision Incident Response Platform
- Integration with Active Directory
- Integration with RuCERT
Integration with other solutions
In this section, you’ll learn how to integrate KUMA with other solutions to enrich its functionality.
Integration with Kaspersky Security Center
Kaspersky Security Center is designed for centralized execution of basic administration and maintenance tasks in an organization's network and provides the administrator access to detailed information about the organization's network security level. KUMA can be integrated with Kaspersky Security Center to receive information about assets. Through correlators you can also send commands to KUMA to create asset-related tasks.
Kaspersky Security Center tasks are functions performed by this program, such as Full computer scan and Database update. For more information about Kaspersky Security Center tasks see Kaspersky Security Center online help.
Preparing Kaspersky Security Center for integration with KUMA
For Kaspersky Security Center and KUMA to be able to interact with each other you must complete steps below:
- Make sure that Kaspersky Security Center can be reached via UDP from KUMA.
- Create user in Kaspersky Security Center with required permissions.
- Create Kaspersky Security Center tasks covering all assets in all applications connected to Kaspersky Security Center.
- Configure Kaspersky Security Center to send events to KUMA. This step is required if you want to receive information about Kaspersky Security Center tasks in KUMA.
Creating KUMA user in Kaspersky Security Center
To create a user in Kaspersky Security Center for KUMA integration:
- In the Kaspersky Security Center Administration Console, select the node with the name of the required Administration Server.
- In the context menu of the Administration Server, select Properties.
- In the Administration Server properties window, select the Security section.
- In the Names of groups or users field, click the Internal user button.
User selection window opens.
- Click the Add user button and add the user.
Only the user name and password are required. When the user is created, it will be appear in the User selection window.
- Select the user you created and click OK.
The user will be displayed in the Names of groups or users field.
- Select the user and in the Rights tab of Permissions for web section of the workspace and configure KUMA user rights:
- Receiving information about assets from Kaspersky Security Center: check the Allow check box in the Basic functionality node next to Read permissions.
- Starting Kaspersky Endpoint Security tasks for Linux: check the Allow check boxes in the Basic functionality node next to Read and Modify permissions.
- Starting scan tasks in Kaspersky Endpoint Security for Windows: check the Allow check boxes in the Basic Functionality and Protection Components nodes next to Read and Modify permissions.
- Starting update tasks in Kaspersky Endpoint Security for Windows: check the Allow check boxes in the Basic functionality and Protection components nodes next to Read and Modify permissions.
- Click OK.
KUMA user is added to Kaspersky Security Center. It can now be used to create a Kaspersky Security Center connection.
Page topConfiguring Kaspersky Security Center to send events to KUMA
If you want to be able to see task related information from Kaspersky Security Center in KUMA, you must configure exporting Kaspersky Security Center events using the CEF format and select event types that must be exported from Kaspersky Security Center.
To export Kaspersky Security Center events to KUMA:
- In the Kaspersky Security Center console tree, select the Administration Server whose events you want to export.
- In the workspace of the selected Administration Server, click the Events tab.
- Click the drop-down arrow next to the Configure notifications and event export link and select Configure export to SIEM system in the drop-down list.
- The events properties window opens, displaying the Event export section.
- In the Event export section, specify the following export settings:
- Select the Automatically export events to SIEM system database check box.
- In the SIEM system drop-down list select ArcSight (CEF format).
- In the SIEM system server address field, enter the web address of the KUMA collector server that will be used to receive events from Kaspersky Security Center.
- In the SIEM system server port field, enter the port where the KUMA collector server will expect Kaspersky Security Center events.
- In the Protocol drop-down list select TCP/IP.
- Click OK.
Automatic export of Kaspersky Security Center events will be enabled. For more information about exporting events from Kaspersky Security Center to SIEM systems, see Kaspersky Security Center online help.
To select event types for export for each Kaspersky Security Center policy you need:
- In the console tree of Kaspersky Security Center, select the Policies node.
- Right-click to open the context menu of the relevant policy and select Properties.
- In the policy properties window that opens, select the Event configuration section.
- In the Info tab select the Task started and Task completed event types and click the Properties button.
- In the event properties window that appears, select the Export to SIEM system using Syslog check box to enable export for the selected events.
- Click OK to save the changes.
- In the policy properties window, click OK.
The selected events will be sent to the KUMA over the Syslog protocol. For more information about exporting events from Kaspersky Security Center using Syslog protocol see Kaspersky Security Center online help.
You must configure KUMA Collector to be able to receive Kaspersky Security Center events. Events from Kaspersky Security Center have DeviceProduct = SecurityCenter field value, which can be used to search them in KUMA.
Example collector for receiving Kaspersky Security Center events is included to KUMA installation package. It is named [Example] KSC. It consists of the connector that listens for TCP port 5141 and, more importantly, of the normalizer [Example] KSC that can you can use to process Kaspersky Security Center events in your own collectors.
Creating KUMA tasks in Kaspersky Security Center
If you want to start asset related tasks in Kaspersky Security Center from KUMA, you must create these tasks in Kaspersky Security Center beforehand.
You must create separate tasks for each Kaspersky program that is not compatible with other. For example, create separate tasks for Linux and Windows products or, if you have Kaspersky Endpoint Security for Windows both version 10 and 11, create separate tasks for each of them. For compatible products create tasks for the latest version.
If you have several hierarchically linked Kaspersky Security Center Administration Servers, you should create tasks on the main Administration Server only. Otherwise create tasks on every secondary Kaspersky Security Center Administration Server.
To create Kaspersky Security Center task :
- In the Kaspersky Security Center console tree, select the administration group for which you want to create a task.
- In the group workspace, select the Tasks tab.
- Run the task creation by clicking the Create a task button.
The New Task Wizard starts.
- Follow the instructions of the Wizard to create the required task.
The name of the task must begin with "
KUMA". For example, "KUMA asset virus scan".
Created task will be displayed in the Tasks section of Kaspersky Security Center console tree. These task can be started from KUMA.
Page topManaging Kaspersky Security Center connections
This section describes working with Kaspersky Security Center connections that are required for integrating Kaspersky Security Center and KUMA.
Kaspersky Security Center connections are created and managed in the Settings section of the KUMA web interface on the Integrations → KSC tab. The right side of the Settings section of the KUMA web interface displays a list of tenants for which Kaspersky Security Center connections are configured. Clicking on a tenant opens a Connections to Kaspersky Security Center window containing a list of created connections to Kaspersky Security Center. When you click on a connection, a detail pane opens with the parameters of the selected connection. You can create multiple Kaspersky Security Center connections.
To enable or disable integration with Kaspersky Security Center:
- Open the KUMA web interface and select the Settings section.
- In the left part of the Settings section, select the Settings → KSC tab.
The Connections to Kaspersky Security Center table will appear on the right in the Settings section.
- Select the tenant for which you want to enable or disable integration with Kaspersky Security Center.
The Kaspersky Security Center connection table will appear on the right in the Settings section.
- Enable or disable integration with Kaspersky Security Center:
- Clear the Disabled check box if you want KUMA to receive information about Kaspersky Security Center assets and send commands to Kaspersky Security Center.
- Select the Disabled check box if you do not want KUMA to receive information about Kaspersky Security Center assets and send commands to Kaspersky Security Center.
By default, this check box is cleared.
- Click Save.
Creating Kaspersky Security Center connection
To create a new Kaspersky Security Center connection:
- Open the KUMA web interface and select the Settings section.
- In the left part of the Settings section, select the Settings → KSC tab.
The Connections to Kaspersky Security Center table will appear on the right in the Settings section.
- Select the tenant for which you want to create a connection to Kaspersky Security Center.
The Kaspersky Security Center connection table will appear on the right in the Settings section.
- Click the Add KSC connection button and set the parameters as described below:
- Name (required)—enter the unique name of the Kaspersky Security Center connection. Must contain from 1 to 128 Unicode characters.
- URL (required)—enter the URL of the Kaspersky Security Center server in the hostname:port or IPv4:port format.
- Disabled—clear this check box if you want to use this Kaspersky Security Center connection. By default, this check box is cleared.
- In the Secret drop-down list select the Secret resource with the credentials of the Kaspersky Security Center you need or create a new Secret resource using the plus button.
Creating resource with Kaspersky Security Center credentials
- Click Save.
The Kaspersky Security Center connection has been created. It can be used to import information about assets from Kaspersky Security Center to KUMA and to create asset related tasks in Kaspersky Security Center from KUMA.
Page topEditing Kaspersky Security Center connection
To edit a Kaspersky Security Center connection:
- Open the KUMA web interface and select the Settings section.
- In the left part of the Settings section, select the Settings → KSC tab.
The Connections to Kaspersky Security Center table will appear on the right in the Settings section.
- Select the tenant for which you want to change the connection to Kaspersky Security Center.
The Kaspersky Security Center connection table will appear on the right in the Settings section.
- Click the Kaspersky Security Center connection you want to change.
The window with the selected Kaspersky Security Center connection parameters opens.
- Make the necessary changes to the parameters:
- Name (required)—enter the unique name of the Kaspersky Security Center connection. Must contain from 1 to 128 Unicode characters.
- URL (required)—enter the URL of the Kaspersky Security Center server in the hostname:port or IPv4:port format.
- Secret (required)—select the Secret resource with required Kaspersky Security Center credentials.
- Disabled—select this check box if you do not want to use this Kaspersky Security Center connection. By default, this check box is cleared.
- Click Save.
The Kaspersky Security Center connection has been modified.
Page topDeleting Kaspersky Security Center connection
To delete a Kaspersky Security Center connection:
- Open the KUMA web interface and select the Settings section.
- In the left part of the Settings section, select the Settings → KSC tab.
The Connections to Kaspersky Security Center table will appear on the right in the Settings section.
- Select the tenant for which you want to delete the connection to Kaspersky Security Center.
The Kaspersky Security Center connection table will appear on the right in the Settings section.
- Click the Kaspersky Security Center connection you want to delete and click the Delete button.
The Kaspersky Security Center connection has been deleted.
Page topWorking with Kaspersky Security Center tasks
If you configured Kaspersky Security Center for KUMA integration and connecting KUMA to Kaspersky Security Center, you can start Kaspersky Security Center tasks from KUMA. You can do this manually from the Assets section of the web interface or automatically by using response rules during the correlation process.
Starting Kaspersky Security Center tasks manually
To start Kaspersky Security Center task manually:
- In the Assets section of the KUMA web interface, select the assets that were imported from Kaspersky Security Center.
The Asset details area opens in the right part of the window with the Start KSC Task button below.
- Click the Start KSC Task button.
The Select KSC Task window opens.
- Select the tasks you want to run and click Start.
Kaspersky Security Center starts selected tasks for the selected assets.
Some types of tasks are available only for certain assets. You can get vulnerability and software information only for assets with Windows operating system.
Page topStarting Kaspersky Security Center tasks automatically
Kaspersky Security Center tasks can be started automatically by Correlators. When certain conditions are met, the Correlator activates Response rules that contain the list of Kaspersky Security Center tasks to start and define the relevant assets.
To configure Response resource that can be used by Correlators to start Kaspersky Security Center task automatically:
- In the KUMA web interface, open Resources → Response.
- Click the Add response button and set parameters as described below:
- In the Name field enter the resource name that will let you identify it.
- In the Type drop-down list, select ksctasks (Kaspersky Security Center tasks).
- In the Kaspersky Security Center task drop-down list, select the tasks that must be run when the correlator linked to this response resource is triggered.
You can select several tasks. When Response is activated, it picks only the first task from the list of the selected tasks that match the relevant asset. The rest of the matching tasks are disregarded. If you want to start several tasks on one condition, you must create several Responses.
- In the Event field select the fields of the event that triggered the Correlator, where the assets for which the task must be run are defined. Possible values:
- SourceAssetID
- DestinationAssetID
- DeviceAssetID
- In the Filter section, you can specify the conditions to define events that will be processed by the created resource. You can select an existing filter resource from the drop-down list, or select Create new to create a new filter.
Creating a filter in resources
- In the Filter drop-down menu, select Create new.
- If you want to keep the filter as a separate resource, set the Save filter toggle switch. This can be useful if you decide to reuse the same filter across different services. The toggle switch is turned off by default.
- If you toggle the Save filter switch on, enter a name for the created filter resource in the Name field. The name must contain from 1 to 128 Unicode characters.
- In the conditions section, specify the conditions that the events must meet:
- The Add condition button is used to add filtering conditions. You can select two values (two operands, left and right) and assign the operation you want to perform with the selected values. The result of the operation is either True or False.
- In the operator drop-down list, select the function to be performed by the filter.
You can use the Match case check box in the Operator drop-down list to choose whether the values passed to the filter should be case sensitive. This check box is cleared by default.
- In the Left operand and Right operand drop-down lists, select where the data to be filtered will come from. As a result of the selection, Advanced settings will appear. Use them to determine the exact value that will be passed to the filter. For example, when choosing active list you will need to specify the name of the active list, the entry key and the entry key field.
- You can use the If drop-down list to choose whether you want to create a negative filter condition.
Conditions can be deleted using the
 button.
 - In the operator drop-down list, select the function to be performed by the filter.
- The Add group button is used to add groups of conditions. Operator AND can be switched between AND, OR, and NOT values.
A condition group can be deleted using the
button. - Using the Add filter button you can add existing filter resources selected in the Select filter drop-down list to the conditions. You can navigate to a nested filter resource using the
 button.
A nested filter can be deleted using the
button.
- The Add condition button is used to add filtering conditions. You can select two values (two operands, left and right) and assign the operation you want to perform with the selected values. The result of the operation is either True or False.
- If necessary, in the Workers field specify the number of response processes that can be run simultaneously.
- Click Save.
The Response resource is created. It can now be linked to a Correlator that would trigger it, starting a Kaspersky Security Center task as a result.
Page topChecking the status of Kaspersky Security Center tasks
In the KUMA web interface, you can check whether a Kaspersky Security Center task was started or whether a search for events owned by the collector listening for Kaspersky Security Center events was completed.
To check the status of Kaspersky Security Center task:
- Sign in to the KUMA web interface.
- Open the Resources section → Active services.
- Select the collector that is configured to receive events from the Kaspersky Security Center server and click the Go to Events button.
A new browser tab will open in the Events section of KUMA. The table displays events from the Kaspersky Security Center server. The status of the tasks can be seen in the Name column.
Kaspersky Security Center event fields:
- Name—status or type of the task.
- Message—message about the task or event.
- FlexString<number>Label—name of the attribute received from Kaspersky Security Center. For example,
FlexString1Label=TaskName. - FlexString<number>—value of the FlexString<number>Label attribute. For example,
FlexString1=Download updates. - DeviceCustomNumber<number>Label—name of the attribute related to the task state. For example,
DeviceCustomNumber1Label=TaskOldState. - DeviceCustomNumber<number>—value related to the task state. For example,
DeviceCustomNumber1=1means the task is executing. - DeviceCustomString<number>Label—name of the attribute related to the detected vulnerability: for example, a virus name, affected application.
- DeviceCustomString<number>—value related to the detected vulnerability. For example, the attribute-value pairs
DeviceCustomString1Label=VirusNameandDeviceCustomString1=EICAR-Test-Filemean that the EICAR test virus was detected.
Importing events from the Kaspersky Security Center database
In KUMA, you can receive events directly from the Kaspersky Security Center SQL database. Events are received by using a collector, which utilizes the provided resources of the connector [Example] KSC SQL and normalizer [Example] KSC from SQL.
To create a collector to receive Kaspersky Security Center events:
Follow the instructions under Creating a collector to select the preconfigured resources in the Installation Wizard:
- At step 2 of the Installation Wizard, select the [Example] KSC SQL connector:
- In the URL field, specify the server connection string in the following format:
sqlserver://user:password@kscdb.example.com:1433/KAVwhere:
user—user account with public and db_datareader rights to the required database.password—user account password.kscdb.example.com:1433—address and port of the database server.KAV—name of the database.
- In the Query field, specify a database query based on the need to receive certain events.
An example of a query to the Kaspersky Security Center SQL database
- In the URL field, specify the server connection string in the following format:
- At step 3 of the Installation Wizard, select the [Example] KSC from SQL normalizer.
- Specify other parameters in accordance with your collector requirements.
Integration with Kaspersky CyberTrace
Kaspersky CyberTrace (hereinafter CyberTrace) is a tool that integrates threat data streams with SIEM solutions. It provides users with instant access to analytics data, increasing their awareness of security decisions.
You can integrate CyberTrace with KUMA in one of the following ways:
- Integrate CyberTrace indicator search feature to enrich KUMA events with information from CyberTrace data streams.
- Integrate the entire CyberTrace web interface into KUMA to get full access to CyberTrace.
CyberTrace web interface integration is available only if your CyberTrace license includes multi-user feature.
Integrating CyberTrace indicator search
Integration of the CyberTrace indicator search function includes the following steps:
- Configuring CyberTrace to receive and process KUMA requests.
You can configure the integration with KUMA immediately after installing CyberTrace in the Quick Start Wizard or later in the CyberTrace web interface.
- Creating an event enrichment rule in KUMA.
After completing all stages of integration, you need to restart the collector responsible for receiving events that you want to enrich with information from CyberTrace.
Configuring the CyberTrace to receive and process requests.
You can configure CyberTrace to receive and process requests from KUMA immediately after its installation in the Quick Start Wizard or later in the program web interface.
To configure CyberTrace to receive and process requests in the Quick Start Wizard:
- Wait for the CyberTrace Quick Start Wizard to start after the program is installed.
The Welcome to Kaspersky CyberTrace window opens.
- In the <select SIEM> drop-down list, select the type of SIEM system from which you want to receive data and click the Next button.
The Connection Settings window opens.
- Do the following:
- In the Service listens on settings block, select the IP and port option.
- In the IP address field, enter
0.0.0.0. - In the Port field, enter
9999. - In the IP address or hostname field below, specify
127.0.0.1.Leave the default values for everything else.
- Click Next.
The Proxy Settings window opens.
- If a proxy server is being used in your organization, define the settings for connecting to it. If not, leave all the fields blank and click Next.
The Licensing Settings window opens.
- In the Kaspersky CyberTrace license key field, add a license key for CyberTrace.
- In the Kaspersky Threat Data Feeds certificate field, add a certificate that allows you to download updated data feeds from servers, and click Next.
CyberTrace will be configured.
To configure CyberTrace to receive and process requests in the program web interface:
- In the CyberTrace web interface window, select Settings – Service.
- In the Connection Settings block:
- Select the IP and port option.
- In the IP address field, enter
0.0.0.0. - In the Port field, enter
9999.
- In the Web interface settings block, in the IP address or hostname field, enter
127.0.0.1. - In the upper toolbar, click Restart Feed Service.
- Select Settings – Events format.
- In the Alert events format field, enter
%Date% alert=%Alert%%RecordContext%. - In the Detection events format field, enter
Category=%Category%|MatchedIndicator=%MatchedIndicator%%RecordContext%. - In the Records context format field, enter
|%ParamName%=%ParamValue%. - In the Actionable fields context format field, enter
%ParamName%:%ParamValue%.
CyberTrace will be configured.
After updating CyberTrace configuration you have to restart the CyberTrace server.
Page topCreating event Enrichment rules
To create event enrichment rules:
- In the KUMA web interface, open Resources → Enrichment rules. In the left part of the window, select or create a folder for the new resource.
The list of available enrichment rules will be displayed.
- Click the Add enrichment rule button to create a new enrichment rule.
The enrichment rule window will be displayed.
- Enter the rule configuration parameters:
- In the Name field, enter a unique name for this type of resource. The name must contain from 1 to 128 Unicode characters.
- In the Tenant drop-down list, select the tenant that will own this resource.
- In the Source kind drop-down list, select cybertrace.
- Specify the URL of the CyberTrace server to which you want to connect. For example, example.domain.com:9999.
- If necessary, use the Number of connections field to specify the maximum number of connections to the CyberTrace server that can be simultaneously established by KUMA. By default, this value is equal to the number of vCPUs of the KUMA Core server.
- In the RPS field, enter the number of requests to the CyberTrace server per second that KUMA can make. The default value is
1000. - In the Timeout field, specify the maximum number of seconds KUMA should wait for a response from the CyberTrace server. Until a response is received or the time expires, the event is not sent to the Correlator. If a response is received before the timeout, it is added to the
TIfield of the event and the event processing continues. The default value is30. - In the Mapping settings block, you must specify the fields of events to be checked via CyberTrace, and define the rules for mapping fields of KUMA events to CyberTrace indicator types:
- In the KUMA field column, select the field whose value must be sent to CyberTrace.
- In the CyberTrace indicator column, select the CyberTrace indicator type for every field you selected:
- ip
- url
- hash
You must provide at least one string to the table. You can use the New line button to add a string, and can use the
button to remove a string. - Use the Debug drop-down list to indicate whether or not to enable logging of service operations. Logging is disabled by default.
- If necessary, in the Description field, add up to 256 Unicode characters describing the resource.
- In the Filter section, you can specify conditions to identify events that will be processed by the enrichment rule resource. You can select an existing filter resource from the drop-down list, or select Create new to create a new filter.
Creating a filter in resources
- In the Filter drop-down menu, select Create new.
- If you want to keep the filter as a separate resource, set the Save filter toggle switch. This can be useful if you decide to reuse the same filter across different services. The toggle switch is turned off by default.
- If you toggle the Save filter switch on, enter a name for the created filter resource in the Name field. The name must contain from 1 to 128 Unicode characters.
- In the conditions section, specify the conditions that the events must meet:
- The Add condition button is used to add filtering conditions. You can select two values (two operands, left and right) and assign the operation you want to perform with the selected values. The result of the operation is either True or False.
- In the operator drop-down list, select the function to be performed by the filter.
You can use the Match case check box in the Operator drop-down list to choose whether the values passed to the filter should be case sensitive. This check box is cleared by default.
- In the Left operand and Right operand drop-down lists, select where the data to be filtered will come from. As a result of the selection, Advanced settings will appear. Use them to determine the exact value that will be passed to the filter. For example, when choosing active list you will need to specify the name of the active list, the entry key and the entry key field.
- You can use the If drop-down list to choose whether you want to create a negative filter condition.
Conditions can be deleted using the
button. - In the operator drop-down list, select the function to be performed by the filter.
- The Add group button is used to add groups of conditions. Operator AND can be switched between AND, OR, and NOT values.
A condition group can be deleted using the
button. - Using the Add filter button you can add existing filter resources selected in the Select filter drop-down list to the conditions. You can navigate to a nested filter resource using the button.
A nested filter can be deleted using the
button.
- The Add condition button is used to add filtering conditions. You can select two values (two operands, left and right) and assign the operation you want to perform with the selected values. The result of the operation is either True or False.
- Click Save.
A new enrichment rule will be created.
CyberTrace indicator search integration is now configured. You can now add the created enrichment rule to a collector. You must restart KUMA collectors to apply the new settings.
If any of the CyberTrace fields in the events details area contains "[{" or "}]" values, it means that information from CyberTrace data feed was processed incorrectly and it's possible that some of the data is not displayed. You can get all data feed information by copying the events TI indicator field value from KUMA and searching for it in the CyberTrace in the indicators section. All relevant information will be displayed in the Indicator context section of CyberTrace.
Integrating CyberTrace interface
You can integrate the CyberTrace web interface into the KUMA web interface. When this integration is enabled, the KUMA web interface will show a CyberTrace section that provides access to the CyberTrace web interface. Integration is configured under Settings → CyberTrace in the KUMA web interface.
To integrate the CyberTrace web interface in KUMA:
- In the KUMA web interface, open Resources → Secrets.
The list of available secrets will be displayed.
- Click the Add secret button to create a new secret. This resource is used to store credentials of the CyberTrace server.
The secret window is displayed.
- Enter information about the secret:
- In the Name field, choose a name for the added secret. The name must contain from 1 to 128 Unicode characters.
- In the Tenant drop-down list, select the tenant that will own this resource.
- In the Type drop-down list, select credentials.
- In the User and Password fields, enter credentials for your CyberTrace server.
- If necessary, in the Description field, add up to 256 Unicode characters describing the resource.
- Click Save.
The CyberTrace server credentials are now saved and can be used in other KUMA resources.
- In the KUMA web interface, open Settings → CyberTrace.
The window with CyberTrace integration parameters opens.
- Make the necessary changes to the following parameters:
- Disabled—clear this check box if you want to integrate the CyberTrace web interface into the KUMA web interface.
- Host (required)—enter the URL of the CyberTrace server in hostname, IPv4, or IPv6 format.
- Port (required)—enter the port of the CyberTrace server.
- In the Secret drop-down list select the Secret resource you created before.
- Click Save.
CyberTrace is now integrated with KUMA ,and the CyberTrace section is displayed in the KUMA web interface.
If you are using the Mozilla Firefox browser to work with the program web interface, data is not displayed in the CyberTrace section. You have to configure the display of data.
To configure data to be displayed in the CyberTrace section:
- In the browser's address bar, enter the URL of the KUMA web interface with port number 7222: https://kuma.example.com:7222.
A window will open to warn you of a potential security threat.
- Click the Details button.
- In the lower part of the window, click the Accept risk and continue button.
An exclusion will be created for the URL of the KUMA web interface.
- In the browser's address bar, enter the URL of the KUMA web interface with port number 7220.
- Go to the CyberTrace section.
Data will be displayed in this section.
Updating CyberTrace deny list (Internal TI)
When the CyberTrace web interface is integrated into the KUMA web interface, you can update the CyberTrace denylist or Internal TI with information from KUMA events.
To update CyberTrace Internal TI:
- Open the event details area from the events table, Alert window, or correlation event window and click the link on a domain, web address, IP address, or file hash.
The context menu opens.
- Select Add to Internal TI CyberTrace.
The selected object is now added to the CyberTrace denylist.
Page topIntegration with Kaspersky Threat Intelligence Portal
The Kaspersky Threat Intelligence Portal combines all of Kaspersky's knowledge about cyberthreats and how they’re related into a single, powerful web service. When integrated with KUMA, it helps KUMA users to make faster and better-informed decisions, providing them with data about URLs, domains, IP addresses, WHOIS / DNS data.
Access to the Kaspersky Threat Intelligence Portal is provided based on a fee. License certificates are created by Kaspersky experts. To obtain a certificate for Kaspersky Threat Intelligence Portal, contact your Technical Account Manager.
Initializing integration
To integrate Kaspersky Threat Intelligence Portal into KUMA:
- In the KUMA web interface, open Resources → Secrets.
The list of available secrets will be displayed.
- Click the Add secret button to create a new secret. This resource is used to store credentials of your Kaspersky Threat Intelligence Portal account.
The secret window is displayed.
- Enter information about the secret:
- In the Name field, choose a name for the added secret.
- In the Tenant drop-down list, select the tenant that will own the created resource.
- In the Type drop-down list, select ktl.
- In the User and Password fields, enter credentials for your Kaspersky Threat Intelligence Portal account.
- If you want, enter a Description of the secret.
- Upload your Kaspersky Threat Intelligence Portal certificate key:
- Click the Upload PFX button and select the PFX file with your certificate.
The name of the selected file appears to the right of the Upload PFX button.
- Enter the password to the PFX file in the PFX password field.
- Click the Upload PFX button and select the PFX file with your certificate.
- Click Save.
The Kaspersky Threat Intelligence Portal account credentials are now saved and can be used in other KUMA resources.
- In the Settings section of the KUMA web interface, open the KTL tab.
The list of available connections will be displayed.
- Make sure the Disabled check box is cleared.
- In the Secret drop-down list select the Secret resource you created before.
You can create a new secret by clicking the button with the plus sign. The created secret will be saved in the Resources → Secrets section.
- If required, select the Proxy resource in the Proxy drop-down list.
- Click Save.
The integration process of Kaspersky Threat Intelligence Portal with KUMA is completed.
Once Kaspersky Threat Intelligence Portal and KUMA are integrated, you can request additional information from the event details area about hosts, domains, URLs, IP addresses, and file hashes (MD5, SHA1, SHA256).
Page topRequesting information from Kaspersky Threat Intelligence Portal
To request information from Kaspersky Threat Intelligence Portal:
- Open the event details area from the events table, Alert window, or correlation event window and click the link on a domain, web address, IP address, or file hash.
The KTL enrichment area opens in the right part of the screen.
- Select check boxes next to the data types you want to request.
If neither check box is selected, all information types are requested.
- In the Maximum number of records in each data group field enter the number of entries per selected information type you want to receive. The default value is
10. - Click Request.
A ktl task has been created. When it is completed, events are enriched with data from Kaspersky Threat Intelligence Portal which can be viewed from the events table, Alert window, or correlation event window.
Page topViewing information from Kaspersky Threat Intelligence Portal
To view information from Kaspersky Threat Intelligence Portal:
Open the event details area from the events table, Alert window, or correlation event window and click the link on a domain, web address, IP address, or file hash for which you had requested information from Kaspersky Threat Intelligence Portal.
The event details area opens in the right part of the screen with data from Kaspersky Threat Intelligence Portal; the time when it was received is indicated at the bottom of the screen.
Information received from Kaspersky Threat Intelligence Portal is cached. If you click a domain, web address, IP address, or file hash in the event details pane for which KUMA has information available, the data from Kaspersky Threat Intelligence Portal opens, with the time it was received indicated at the bottom, instead of the KTL enrichment window. You can update the data.
Page topUpdating information from Kaspersky Threat Intelligence Portal
To update information, received from Kaspersky Threat Intelligence Portal:
- Open the event details area from the events table, Alert window, or correlation event window and click the link on a domain, web address, IP address, or file hash for which you had requested information from Kaspersky Threat Intelligence Portal.
- Click Update in the event details area containing the data received from the Kaspersky Threat Intelligence Portal.
The KTL enrichment area opens in the right part of the screen.
- Select the check boxes next to the types of information you want to request.
If neither check box is selected, all information types are requested.
- In the Maximum number of records in each data group field enter the number of entries per selected information type you want to receive. The default value is
10. - Click Update.
The KTL task is created and new data is requested received from Kaspersky Threat Intelligence Portal.
- Close the KTL enrichment window and the details area with KTL information.
- Open the event details area from the events table, Alert window or correlation event window and click the link on a domain, URL, IP address, or file hash for which you updated Kaspersky Threat Intelligence Portal information and select Show information in KTL.
The event details area opens on the right with data from Kaspersky Threat Intelligence Portal, indicating the time when it was received on the bottom of the screen.
Page topIntegration with R-Vision Incident Response Platform
R-Vision Incident Response Platform (hereinafter referred to as R-Vision IRP) is a software platform used for automation of monitoring, processing, and responding to information security incidents. It aggregates cyberthreat data from various sources into a single database for further analysis and investigation to facilitate incident response capabilities.
R-Vision IRP can be integrated with KUMA. When this integration is enabled, the creation of a KUMA alert triggers the creation of an incident in R-Vision IRP. A KUMA alert and its R-Vision IRP incident are interdependent. When the status of an incident in R-Vision IRP is updated, the status of the corresponding KUMA alert is also changed.
Integration of R-Vision IRP and KUMA is configured in both applications.
KUMA alert and R-Vision IRP incident fields mapping when transferring data via API
KUMA alert field |
R-Vision IRP incident field |
|
|
|
|
|
|
(as a JSON file) |
|
Configuring integration in KUMA
This section describes integration of KUMA with R-Vision IRP from the KUMA side.
Integration in KUMA is configured in the Settings → R-Vision section of the KUMA web interface.
To configure integration with R-Vision IRP:
- In the KUMA web interface, open Resources → Secrets.
The list of available secrets will be displayed.
- Click the Add secret button to create a new secret. This resource is used to store token for R-Vision IRP API requests.
The secret window is displayed.
- Enter information about the secret:
- In the Name field, enter a name for the added secret. Must contain from 1 to 128 Unicode characters.
- In the Tenant drop-down list, select the tenant that will own the created resource.
- In the Type drop-down list, select token.
- In the Token field, enter your R-Vision IRP API token.
You can obtain the token in the R-Vision IRP web interface under Settings → General → API.
- If required, add the secret description in the Description field. The description must contain from 1 to 256 Unicode characters.
- Click Save.
The R-Vision IRP API token is now saved and can be used in other KUMA resources.
- In the KUMA web interface, open Settings → R-Vision.
The window containing R-Vision IRP integration settings opens.
- Make the necessary changes to the following parameters:
- Disabled—select this check box if you want to disable R-Vision IRP integration with KUMA.
- In the Secret drop-down list, select the previously created Secret resource.
You can create a new secret by clicking the button with the plus sign. The created secret will be saved in the Resources → Secrets section.
- URL (required)—URL of the R-Vision IRP server host.
- ID field (required)—name of the R-Vision IRP field where the ID of KUMA alert must be written.
- URL field (required)—name of the R-Vision IRP field where the link for accessing the KUMA alert should be written.
- Company—company name (when working with multiple customers).
- Category (required)—category of R-Vision IRP incident that is created after KUMA alert is received.
- Event columns (required)—a drop-down list for selecting KUMA event fields that should be sent to R-Vision IRP.
- Priority group of settings (required)—used to map KUMA priority values to R-Vision IRP priority values.
- Click Save.
In KUMA integration with R-Vision IRP is now configured. If integration is also configured in R-Vision IRP, when alerts appear in KUMA, information about those alerts will be sent to R-Vision IRP to create an incident. The Details on alert section in the KUMA web interface displays a link to R-Vision IRP.
Page topConfiguring integration in R-Vision IRP
This section describes integration of KUMA with R-Vision IRP from the KUMA side.
Integration in R-Vision IRP is configured in the Settings section of the R-Vision IRP web interface. For details on configuring R-Vision IRP, please refer to the documentation on this application.
Configuring integration with KUMA consists of the following steps:
- Configuring R-Vision IRP user role
- Assign the Incident manager system role to the R-Vision IRP user utilized for integration. The role is assigned when a user is selected in the R-Vision IRP web interface in the Settings → General → System users section. The role is added in the System Roles block of settings.
R-Vision IRP user with the Incident Manager role

- Make sure that the API token of the R-Vision IRP user utilized for integration is indicated in the secret in the KUMA web interface. The token is displayed in the R-Vision IRP web interface under Settings → General → API.
- Assign the Incident manager system role to the R-Vision IRP user utilized for integration. The role is assigned when a user is selected in the R-Vision IRP web interface in the Settings → General → System users section. The role is added in the System Roles block of settings.
- Configuring R-Vision IRP incident fields and KUMA alerts fields
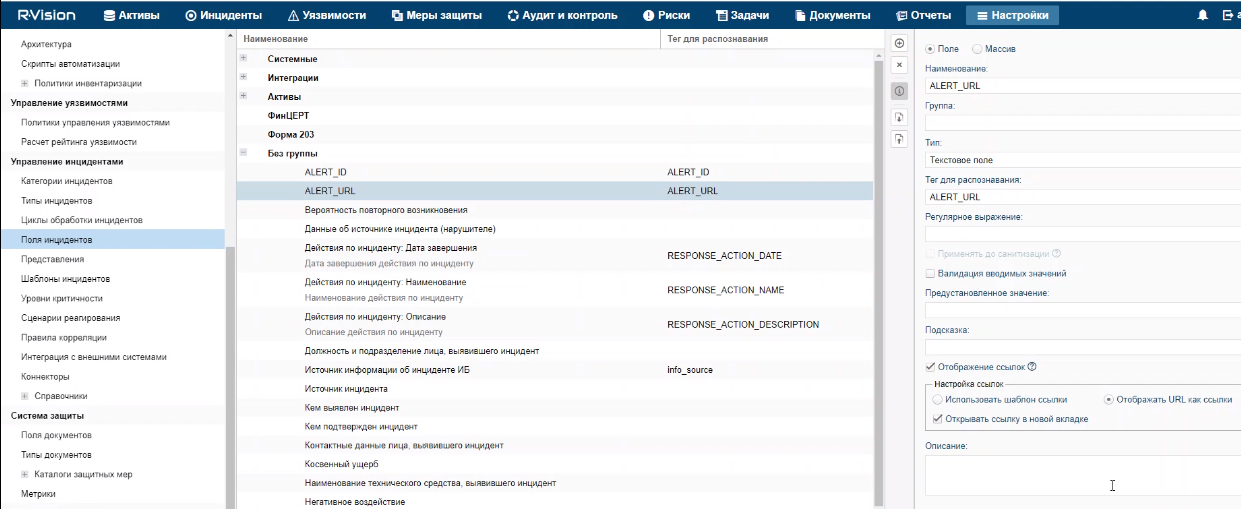
- Add the ALERT_ID and ALERT_URL incident fields.
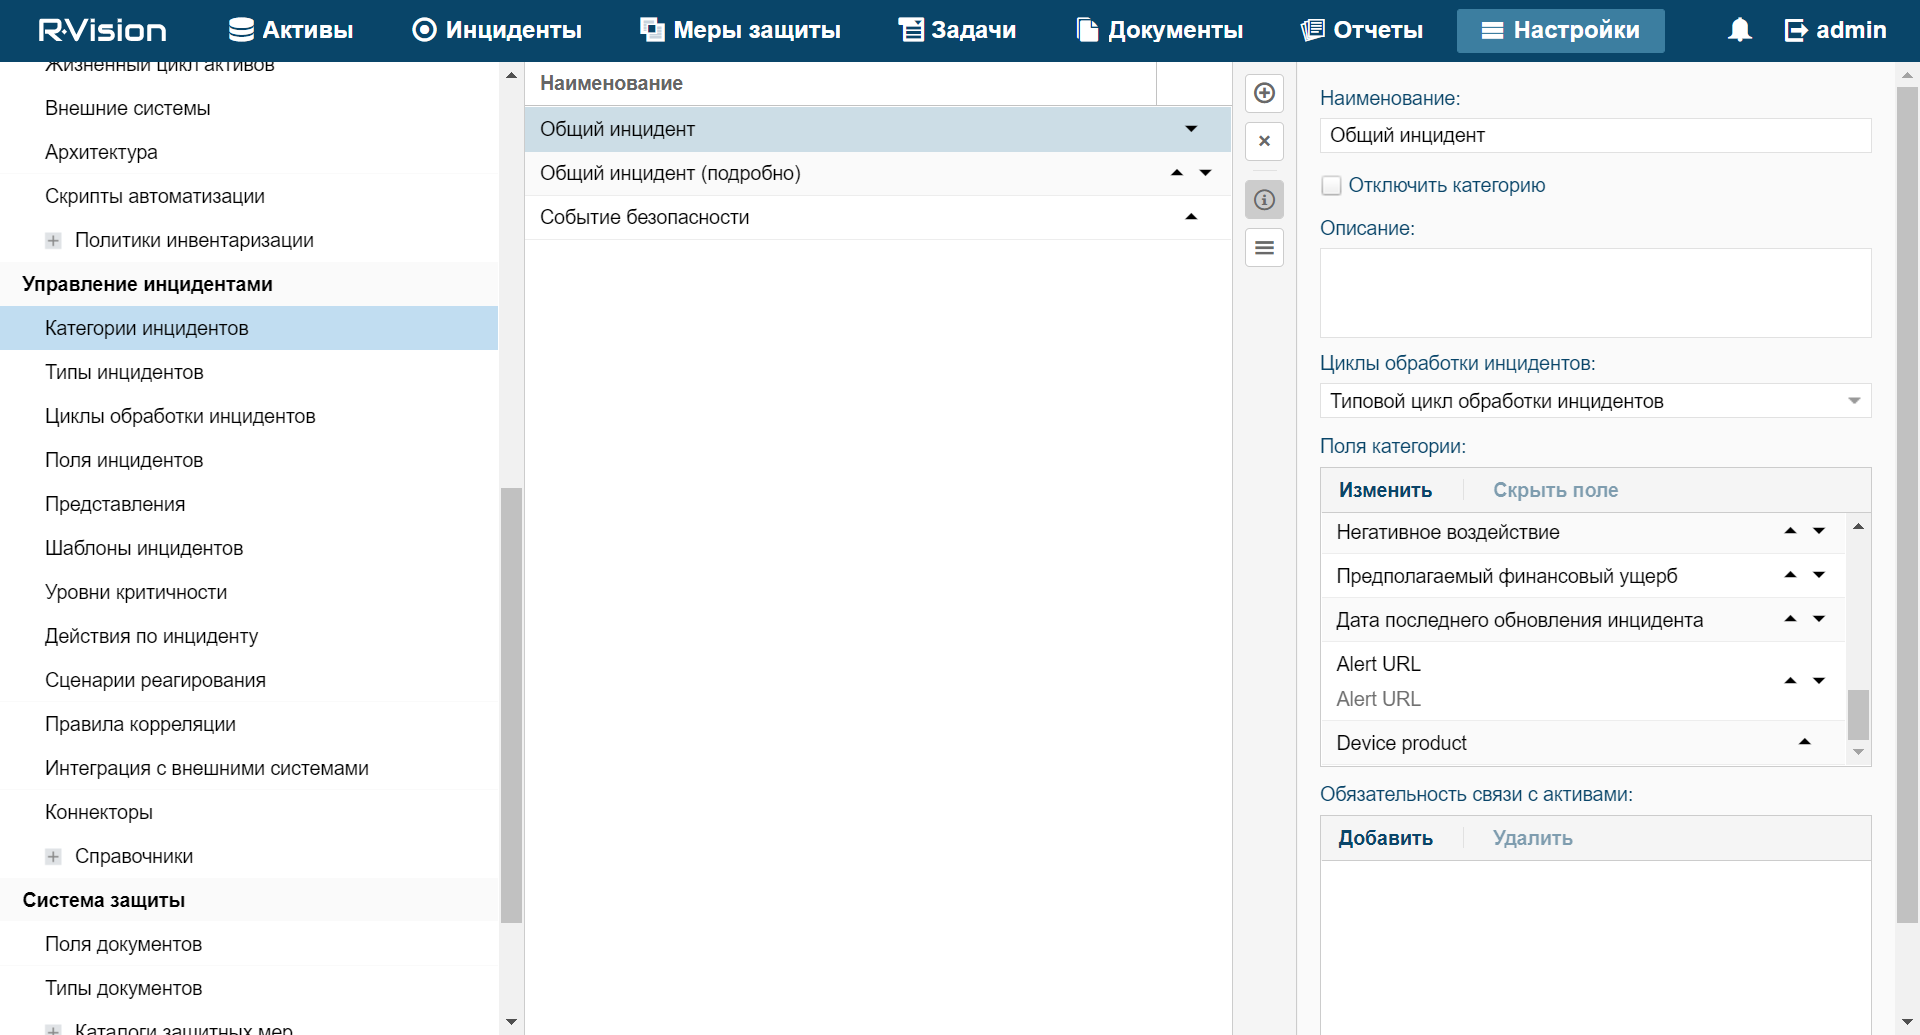
- Configure the category of R-Vision IRP incidents created based on KUMA alerts. You can do this in the R-Vision IRP web interface, in the Settings → Incident management → Incident categories section. Add a new incident category or edit an existing incident category by indicating the previously created
Alert IDandAlert URLincident fields in the Category fields settings block. TheAlert IDfield can be hidden.Categories of incidents containing data from KUMA alerts
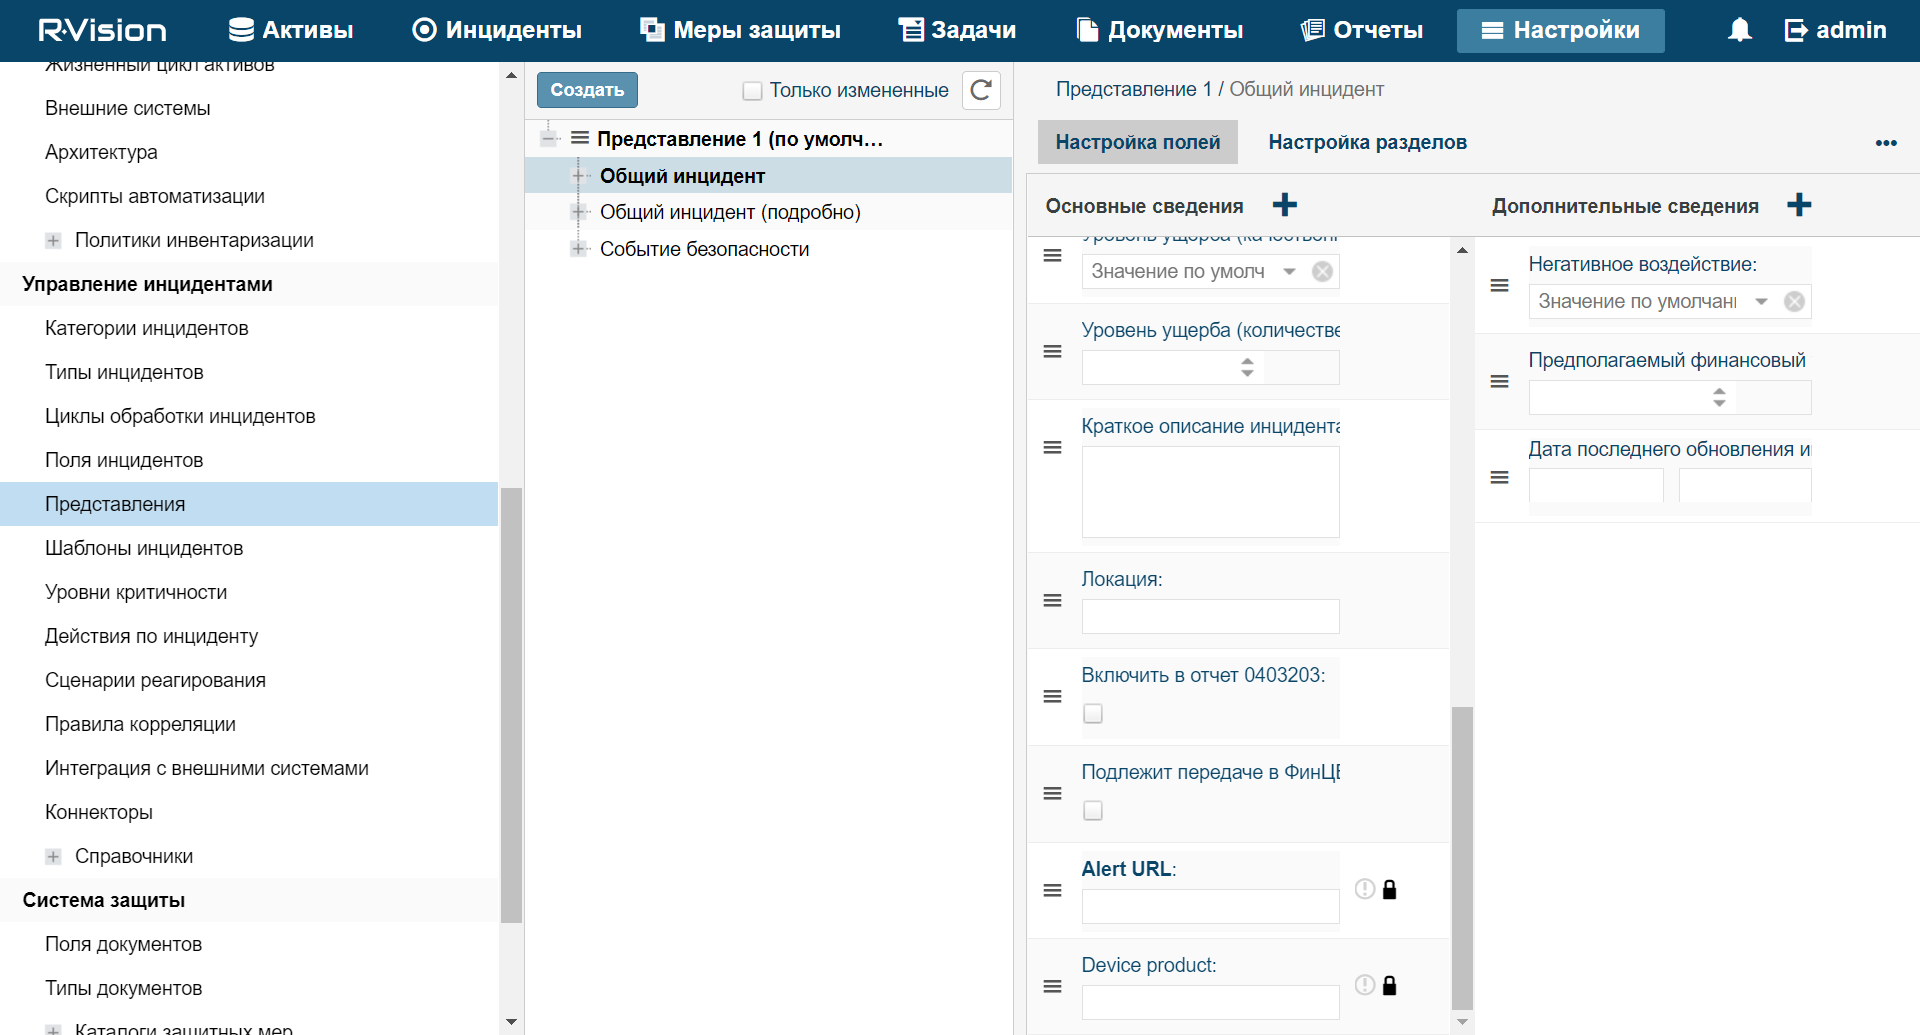
- Block editing of previously created
Alert IDandAlert URLincident fields. In the R-Vision IRP web interface, under Settings → Incident management → Presentation, select the category of R-Vision IRP incidents that will be created based on KUMA alerts and put a lock icon next to theAlert IDandAlert URLincident fields.Alert URL field unavailable for editing
- Creating R-Vision IRP collector and connector
- Creating a rule to close a KUMA alert
Create a rule for sending KUMA alert closing request when R-Vision IRP incident is closed.
In R-Vision IRP integration with KUMA is now configured. If integration is also configured in KUMA, when alerts appear in KUMA, information about those alerts will be sent to R-Vision IRP to create an incident. The Details on alert section in the KUMA web interface displays a link to R-Vision IRP.
Adding the ALERT_ID and ALERT_URL incident fields
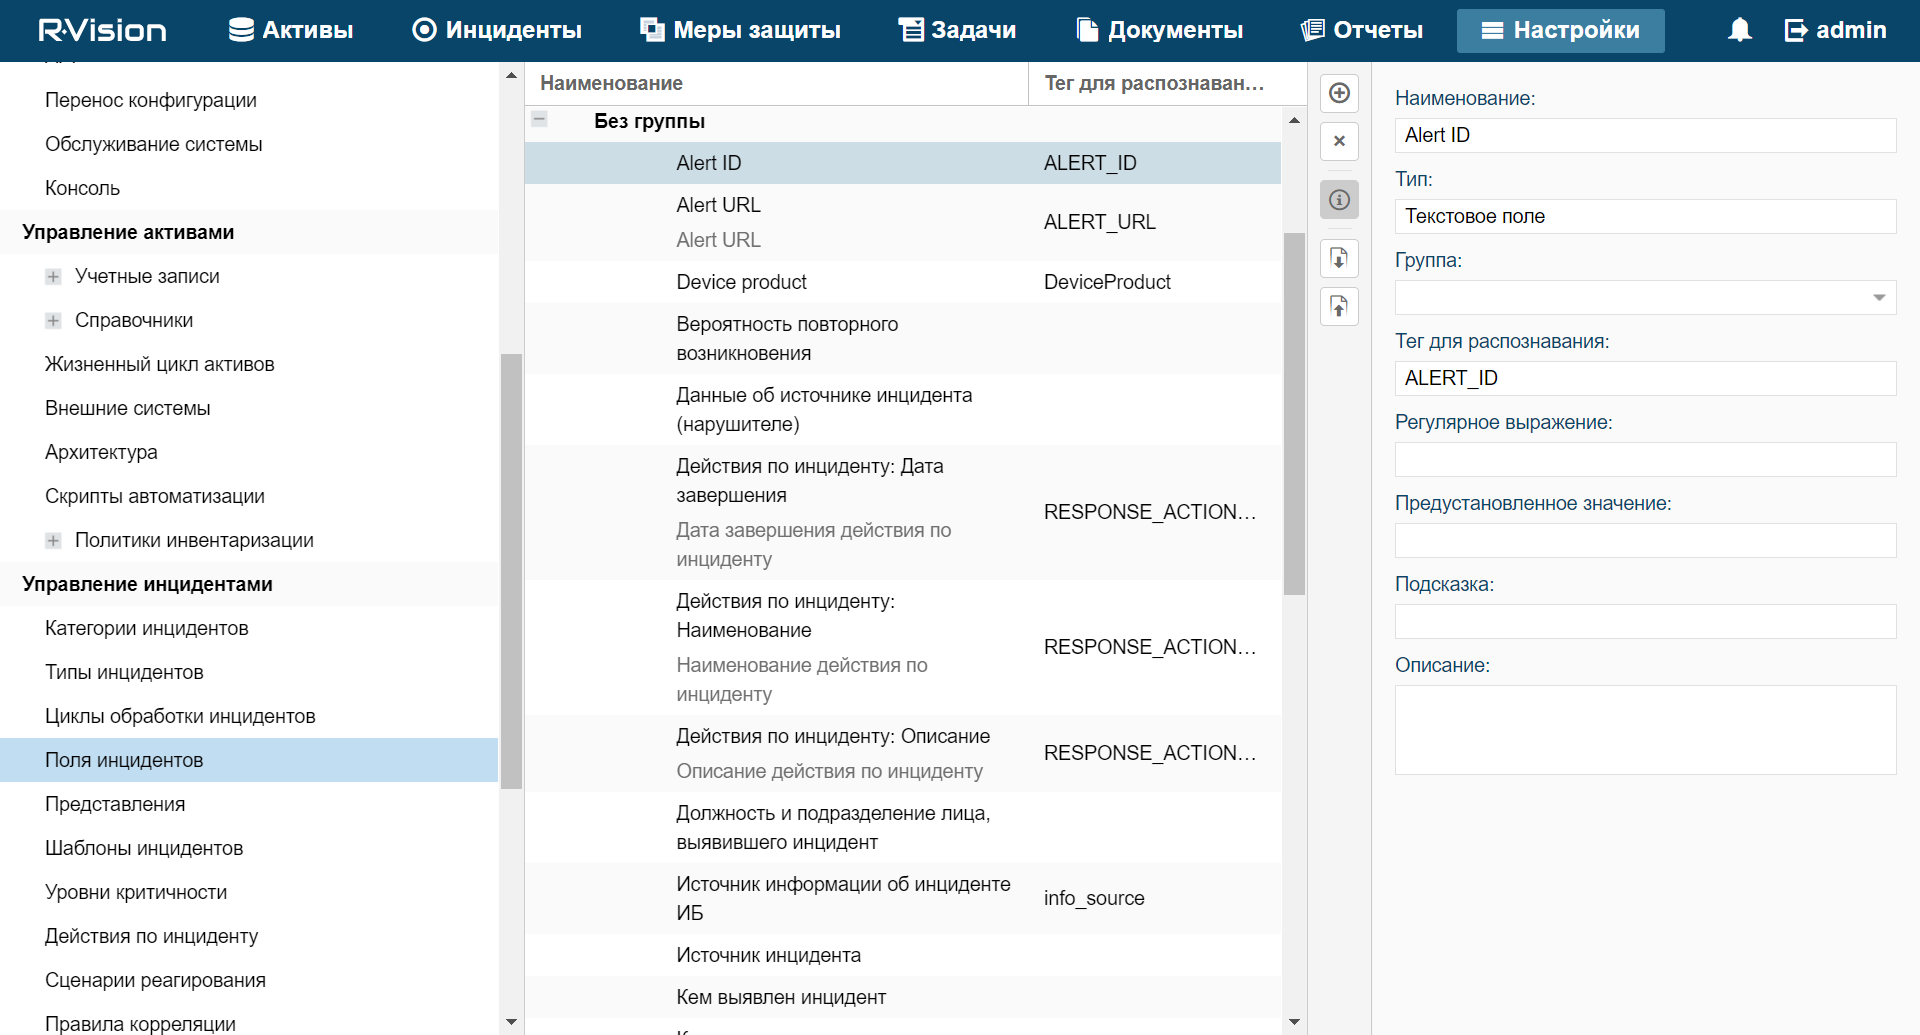
To add the ALERT_ID incident field in the R-Vision IRP:
- In the R-Vision IRP web interface, under Settings → Incident management → Incident fields, select the No group fields group.
- Click the plus icon in the right part of the screen.
The right part of the screen will display the settings area for the incident field you are creating.
- In the Title field, enter the name of the field (for example:
Alert ID). - In the Type drop-down list, select Text field.
- In the Parsing Tag field, enter
ALERT_ID.
ALERT_ID field added to R-Vision IRP incident.
To add the ALERT_URL incident field in the R-Vision IRP:
- In the R-Vision IRP web interface, under Settings → Incident management → Incident fields, select the No group fields group.
- Click the plus icon in the right part of the screen.
The right part of the screen will display the settings area for the incident field you are creating.
- In the Title field, enter the name of the field (for example:
Alert URL). - In the Type drop-down list, select Text field.
- In the Parsing Tag field, enter
ALERT_URL. - Select the Display links and Display URL as links check boxes.
ALERT_URL field added to R-Vision IRP incident.
If necessary, you can likewise configure the display of other data from a KUMA alert in an R-Vision IRP incident.
Page topCreating R-Vision IRP collector
To create R-Vision IRP collector:
- In the R-Vision IRP web interface, under Settings → Asset Management → System components, click the plus icon.
- Specify the collector name in the Title field (example:
Main collector). - In the Collector address field, enter the IP address or hostname where the R-Vision IRP is installed (example:
127.0.0.1). - In the Port field type
3001. - Select Default collector and Use for reaction check boxes.
- Click Add.
R-Vision IRP collector created.
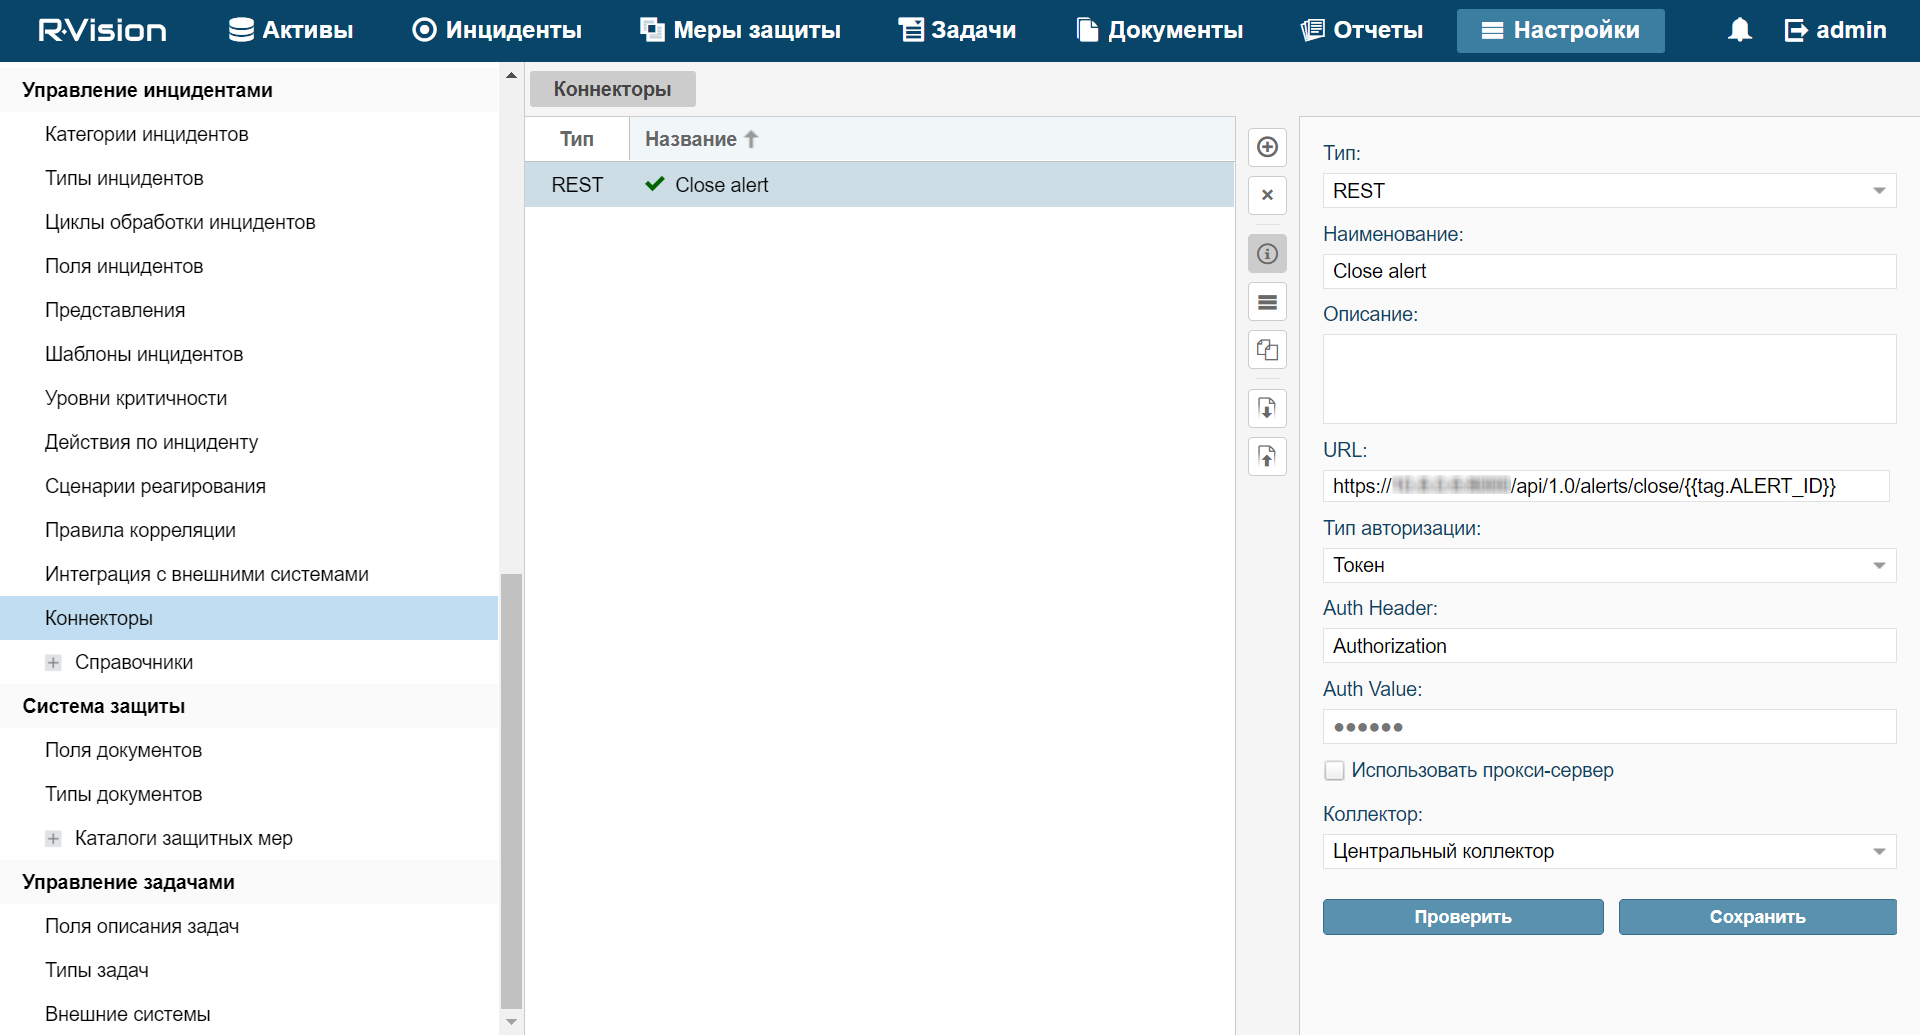
Page topCreating connector in R-Vision IRP
To create connector in R-Vision IRP:
- In the R-Vision IRP web interface, under Settings → Incident management → Connectors, click the plus icon.
- In the Type drop-down list, select REST.
- Specify the connector name in the Name field (example:
KUMA). - In the URL field type API request to close an alert in the format
<KUMA Core server FQDN>:<Port used for API requests (7223 by default)>/api/v1/alerts/close.Example:
https://kuma-example.com:7223/api/v1/alerts/close - In the Authorization type drop-down list, select Token.
- In the Auth header field type
Authorization. - In the Auth value field enter the token of KUMA user with general administrator role.
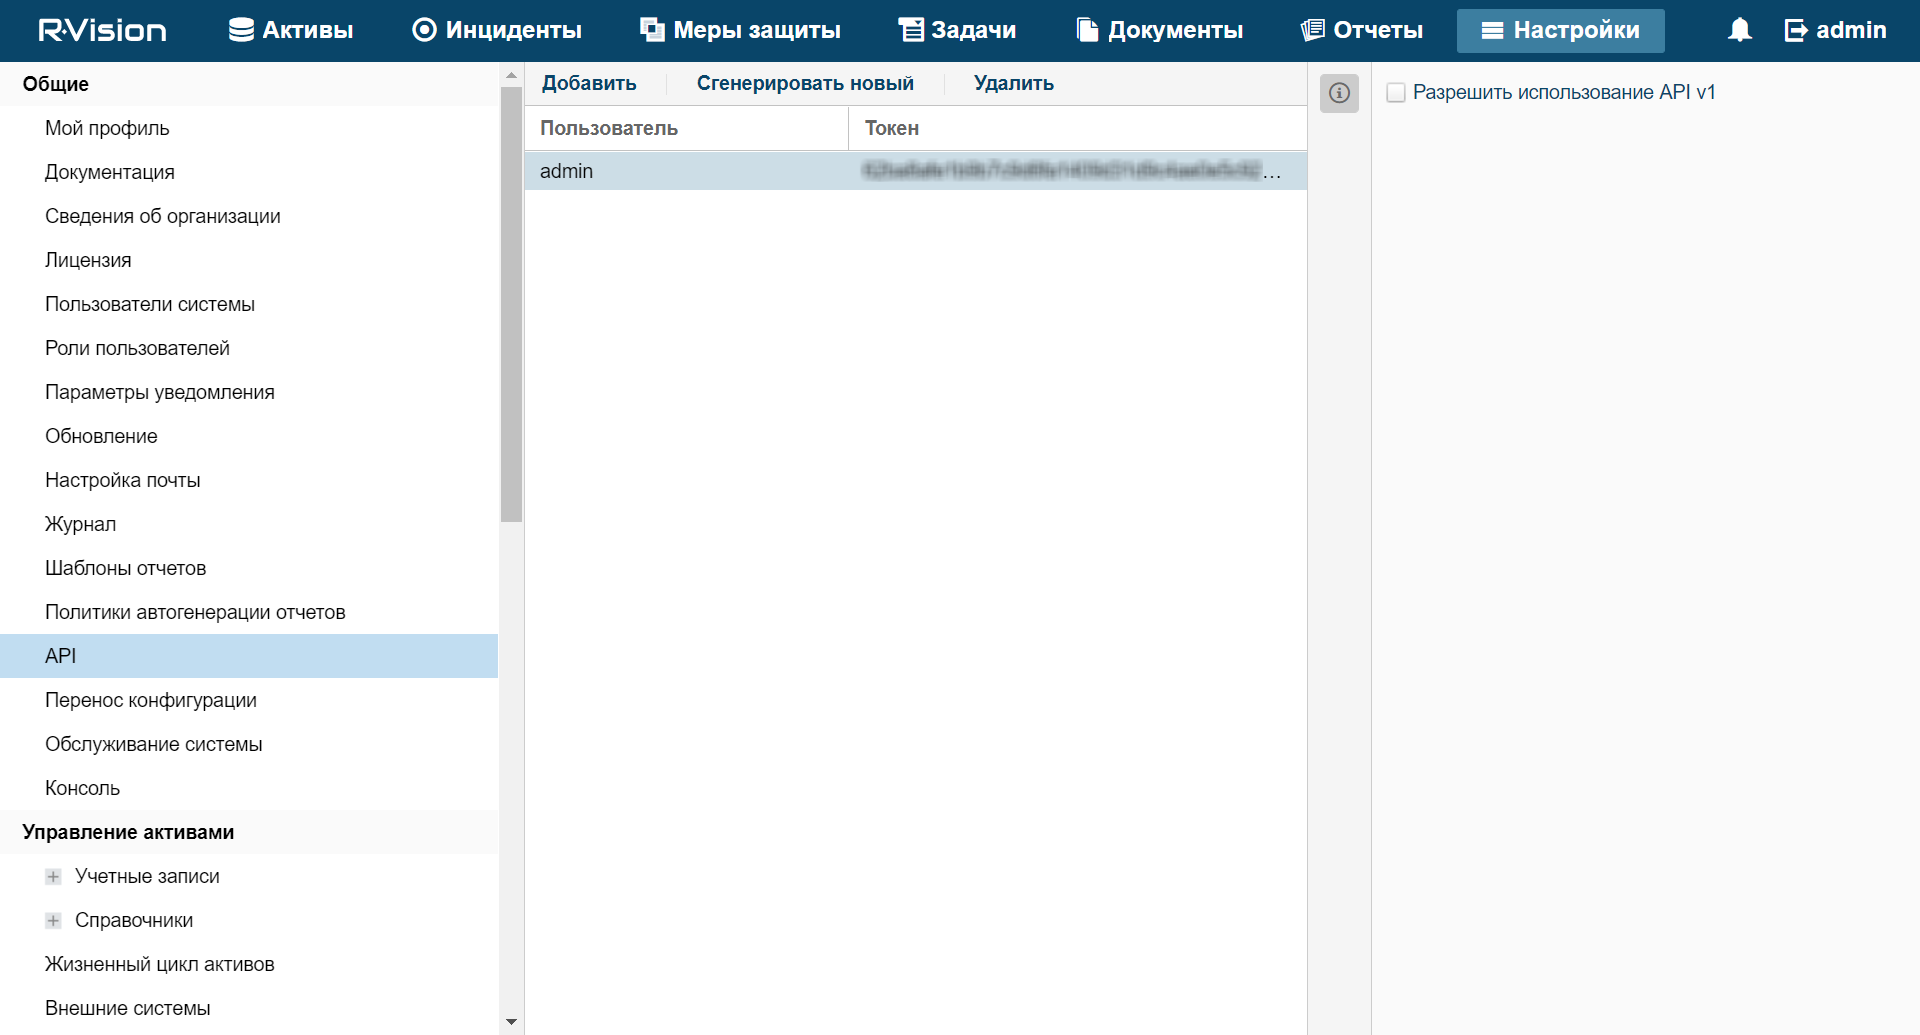
The token of the KUMA general administrator can be obtained in the KUMA web interface under Settings → Users.
- In the Collector drop-down list select previously created collector.
- Click Save.
R-Vision IRP connector is created.
When connector is created you must configure sending API queries for closing alerts in KUMA.
To configure API queries in R-Vision IRP:
- In the R-Vision IRP web interface, under Settings → Incident management → Connectors open for editing a newly created connector.
- In the request type drop-down list, select POST.
- In the Params field type API request to close an alert in the format
<KUMA Core server FQDN>:<Port used for API requests (7223 by default)>/api/v1/alerts/close.Example:
https://kuma-example.com:7223/api/v1/alerts/close - On the HEADERS tab add the following keys and values:
- Key
Content-Type; value:application/json. - Key
Authorization; value:Bearer <KUMA general administrator token>.The token of the KUMA general administrator can be obtained in the KUMA web interface under Settings → Users.
- Key
- On the BODY → Raw tab type contents of the API request body:
{"id":"{{tag.ALERT_ID}}"“Reason”:”<comment to add to KUMA alert when it is closed. For example, "Responded to alert from R-Vision">"} - Click Save.
R-Vision IRP connector is configured.
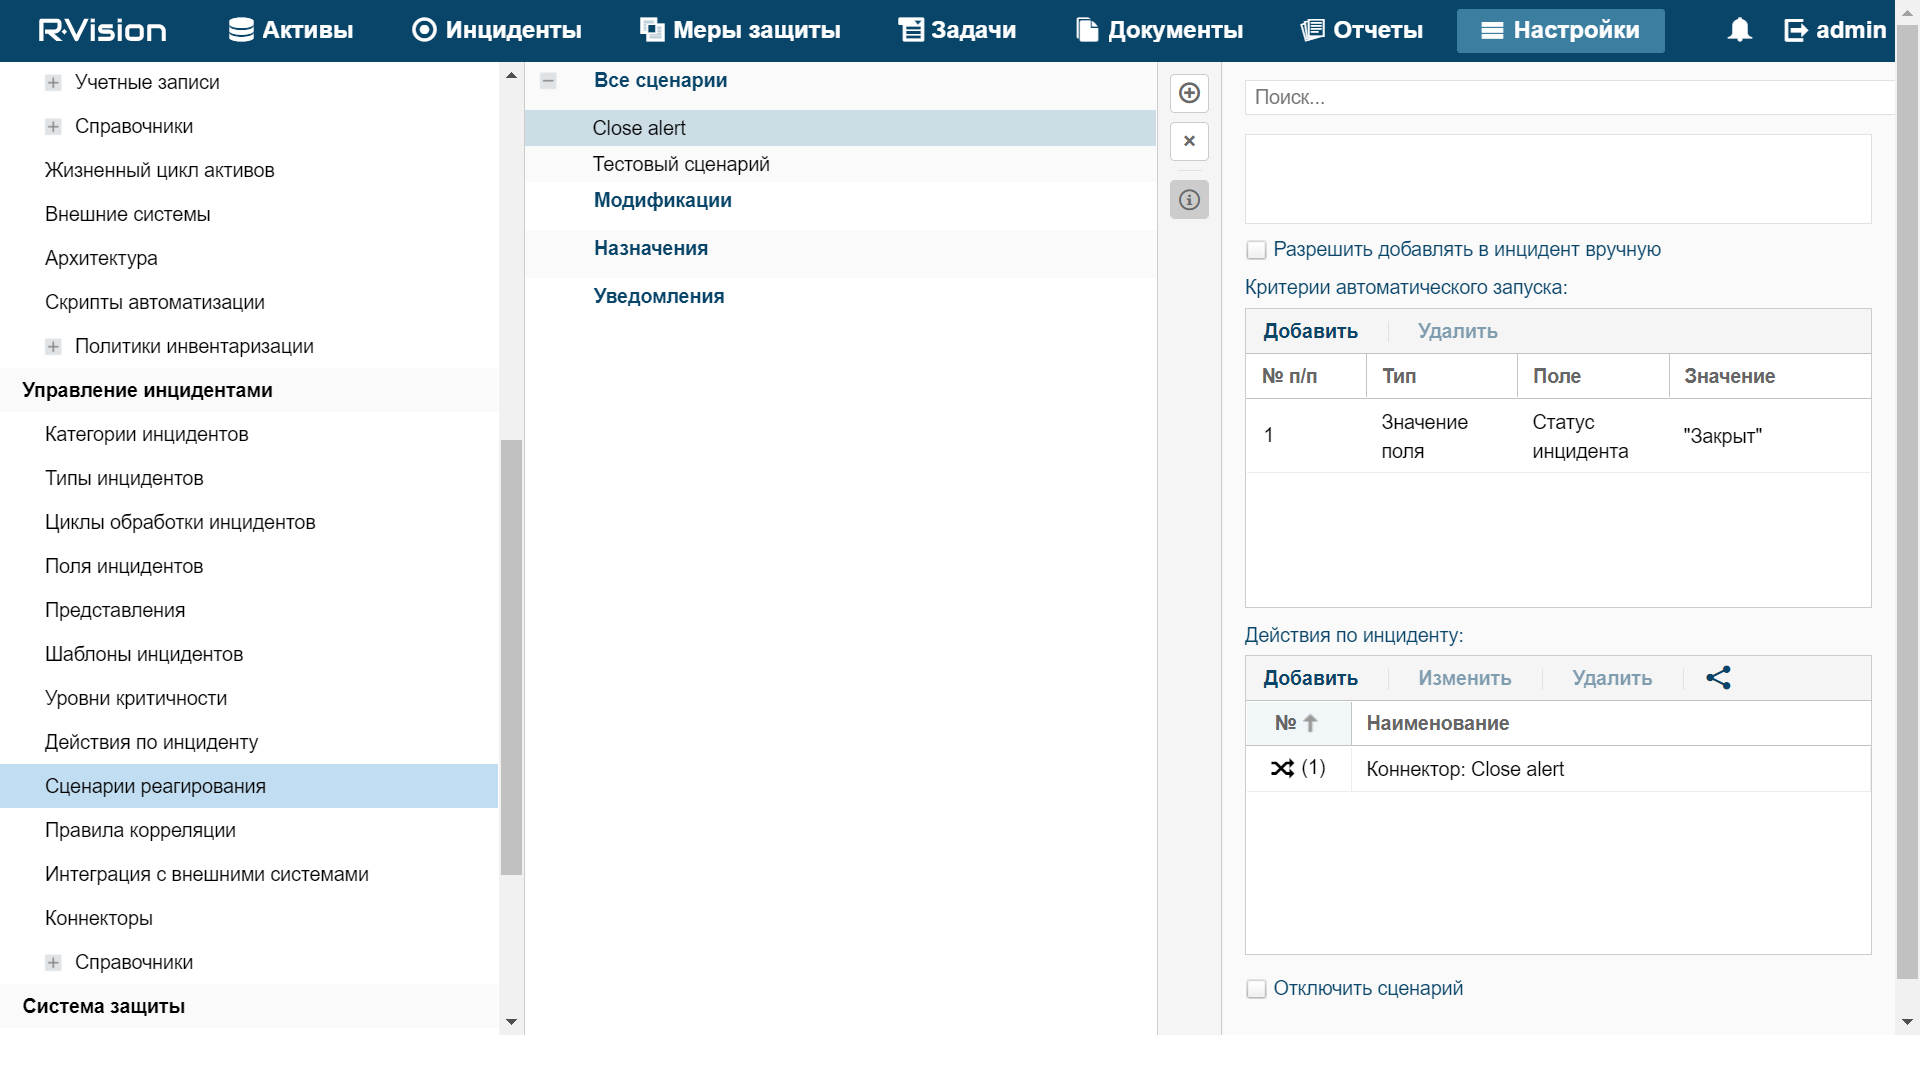
Creating rule for closing KUMA alert when R-Vision IRP incident is closed
To create a rule for sending KUMA alert closing request when R-Vision IRP incident is closed:
- In the R-Vision IRP web interface, under Settings → Incident management → Response playbooks, click the plus icon.
- In the Title field, type the name of the rule, for example,
Close alert. - In the Group drop-down list select All playbooks.
- In the Autostart criteria settings block, click Add and enter the conditions for triggering the rule in the opened window:
- In the Type drop-down list, select Field value.
- In the Field drop-down list, select Incident status.
- Select the Closed status.
- Click Add.
Rule trigger conditions are added. The rule will trigger when an incident is closed.
- In the Incident Response Actions settings block, click Add → Run connector and in the window that opens select the connector that should be run when the rule is triggered:
- In the Connector drop-down list select previously created connector.
- Click Add.
Connector added to the rule.
- Click Add.
A rule for sending KUMA alert closing request when R-Vision IRP incident created.
Managing alerts using R-Vision IRP
After integration of KUMA and R-Vision IRP is configured, data on KUMA alerts is received in R-Vision IRP. Any change to alert settings in KUMA is reflected in R-Vision IRP. Any change in the statuses of alerts in KUMA or R-Vision IRP (except closing an alert) is also reflected in the other system.
Alert management scenarios when KUMA and R-Vision IRP are integrated:
- Forward cyberthreat data from KUMA to R-Vision IRP
Data on detected alerts is automatically forwarded from KUMA to R-Vision IRP. An incident is also created in R-Vision IRP.
The following information about a KUMA alert is forwarded to R-Vision IRP:
- ID.
- Name.
- Status.
- Date of the first event related to the alert.
- Date of the last detection related to the alert.
- User account name or email address of the security officer assigned to process the alert.
- Alert priority.
- Category of the R-Vision IRP incident corresponding to the KUMA alert.
- Hierarchical list of events related to the alert.
- List of devices (internal and external) related to the alert.
- List of users related to the alert.
- Alert change log.
- Link to the alert in KUMA.
- Investigate cyberthreats in KUMA
Initial processing of an alert is performed in KUMA. The security officer can update and change any parameters of an alert except its ID and name. Any implemented changes are reflected in the R-Vision IRP incident card.
If a cyberthreat turns out to be a false positive and its alert is closed in KUMA, its corresponding incident in R-Vision IRP is also automatically closed.
- Close incident in R-Vision IRP
After all necessary work is completed on an incident and the course of the investigation is recorded in R-Vision IRP, the incident is closed. The corresponding KUMA alert is also automatically closed.
- Open a previously closed incident
If active monitoring detects that an incident was not completely resolved or if additional information is detected, this incident is re-opened in R-Vision IRP. However, the alert remains closed in KUMA.
The security officer can use a link to navigate from an R-Vision IRP incident to the corresponding alert in KUMA and make the necessary changes to any of its parameters except the ID, name, and status of the alert. Any implemented changes are reflected in the R-Vision IRP incident card.
Further analysis is performed in R-Vision IRP. When the investigation is complete and the incident is closed again in R-Vision IRP, the status of the corresponding alert in KUMA remains closed.
- Request additional data from the source system as part of the response playbook or manually
If additional information is required from KUMA when analyzing incidents in R-Vision IRP, you can send to KUMA a search request (for example, you can request telemetry data, reputation, host info). This request is sent via REST API KUMA and the response is recorded in the R-Vision IRP incident card for further analysis and report generation.
This same sequence of actions is performed during automatic processing if it is not possible to immediately save all information on an incident during an import.
Integration with Active Directory
You can integrate KUMA with Active Directory services that are used in your organization.
You can configure a connection to the Active Directory catalog service over the LDAP protocol. This lets you use information from Active Directory in correlation rules for enrichment of events and alerts, and for analytics.
If you configure a connection to a domain controller server, you can use domain authorization. In this case, you will be able to bind groups of users from Active Directory to KUMA role filters. The users belonging to these groups will be able to use their domain account credentials to log in to the KUMA web interface and will obtain access to application sections based on their assigned role.
It is recommended to create these groups of users in Active Directory in advance if you want to provide such groups with the capability to complete authorization using their domain account in the KUMA web interface. An email address must be indicated in the properties of a user account in Active Directory.
Connecting over LDAP
LDAP connections are created and managed under Settings → LDAP in the KUMA web interface. The LDAP table shows the tenants for which LDAP connections were created. The connections are displayed when a tenant is selected.
To add a tenant to the LDAP section:
- In the KUMA web interface, under Settings → LDAP, click Add.
- In the LDAP connections window, in the Tenant drop-down list, select the relevant tenant and click Save.
The tenant will be added and displayed in the LDAP table.
If you select a tenant, the LDAP connections window opens to show a table containing existing LDAP connections. Connections can be created or selected for editing.
After integration is enabled, information about Active Directory accounts becomes available in the alert window, the correlation events detailed view window, and the incidents window. If you click an account name in the Related users section of the window, the Account details window opens with the data imported from Active Directory.
Data from LDAP can also be used when enriching events in collectors and in analytics.
Imported Active Directory attributes
In the Data storage time field, you can specify how many days KUMA will store information received from LDAP after such information stops being received from the Active Directory server.
Enabling and disabling LDAP integration
You can enable or disable all LDAP connections of the tenant at the same time, or enable and disable an LDAP connection individually.
To enable or disable all LDAP connections of a tenant:
- Open Settings → LDAP in the KUMA web interface and select the tenant for which you want to enable or disable all LDAP connections.
The LDAP connections window opens.
- Select or clear the Disabled check box.
- Click Save.
To enable or disable a specific LDAP connection:
- Open Settings → LDAP in the KUMA web interface and select the tenant for which you want to enable or disable an LDAP connection.
The LDAP connections window opens.
- Select the relevant connection and either select or clear the Disabled check box in the opened window.
Creating a connection
To create a new LDAP connection to Active Directory:
- Open the Settings → LDAP section in the KUMA web interface.
- Select the tenant for which you want to create a connection to LDAP.
The LDAP connections window opens.
- Click the Add LDAP connection button.
The LDAP connection window opens.
- Add a secret containing the account credentials for connecting to the Active Directory server. To do so:
- If you previously added a secret, use the Secret drop-down list to select the existing secret resource (with the credentials type).
The selected secret can be changed by clicking on the
 button.
 - If you want to create a new secret, click the
 button.
The Secret window opens.
- In the Name (required) field, enter the name of the resource. This name can contain from 1 to 128 Unicode characters.
- In the User and Password (required) fields, enter the account credentials for connecting to the Active Directory server.
You can enter the user name in one of the following formats: <user name>@<domain> or <domain><user name>.
- In the Description field, you can enter up to 256 Unicode characters to describe the resource.
- Click the Save button.
- If you previously added a secret, use the Secret drop-down list to select the existing secret resource (with the credentials type).
- In the Name (required) field, enter the unique name of the LDAP connection.
Must contain from 1 to 128 Unicode characters.
- In the URL (required) field, enter the address of the domain controller in the format
<hostname or IP address of server>:<port>.In case of server availability issues, you can specify multiple servers with domain controllers by separating them with commas. All of the specified servers must reside in the same domain.
- In the TLS mode select whether you want to use TLS encryption for domain controllers connection. When using an encrypted connection, it is impossible to specify an IP address as a URL.
- If you enabled TLS encryption at the previous step, add a TLS certificate. To do so:
- If you previously uploaded a certificate, select it from the Certificate drop-down list.
- If you want to upload a new certificate, click the
 button on the right of the Certificate list.
The Secret window opens.
- In the Name field, enter the name that will be displayed in the list of certificates after the certificate is added.
- Click the Upload certificate file button to add the file containing the Active Directory certificate. X.509 certificate public keys in Base64 are supported.
- If necessary, provide any relevant information about the certificate in the Description field.
- Click the Save button.
The certificate will be uploaded and displayed in the Certificate list.
- In the Timeout in seconds field, indicate the amount of time to wait for a response from the domain controller server.
If multiple addresses are indicated in the URL field, KUMA will wait the specified amount of seconds for a response from the first server. If no response is received during that time, the program will contact the next server, and so on. If none of the indicated servers responds during the specified amount of time, the connection will be terminated with an error.
- If necessary in the RPS field, enter the number of requests per second in cron format. By default, the information is requested once per day.
- If necessary in the Filter field, specify an LDAP filter. For example, “
(&(sAMAccountType=805306368)(!(userAccountControl:1.2.840.113556.1.4.803:=2))”.sAMAccountType = 805306368filter is required. If it is missing in the user filter expression, it will be added to the Active Directory request automatically. - In the Base DN field, enter the base distinguished name of the directory where the search request should be performed.
- If necessary in the Size limit per request field, enter the maximum size of the request.
- Select the Disabled check box if you do not want to use this LDAP connection.
This check box is cleared by default.
- Click the Save button.
The LDAP connection to Active Directory will be created and displayed in the LDAP connection window.
Account information from Active Directory will be requested in 12 hours. To make the data available right away, restart the KUMA Core server. Account information is updated every 12 hours.
If you want to use multiple LDAP connections simultaneously for one tenant, you need to make sure that the domain controller address indicated in each of these connections is unique. Otherwise KUMA lets you enable only one of these connections. When checking the domain controller address, the program does not check whether the port is unique.
Page topRemoving a connection
To delete LDAP connection to Active Directory:
- Open Settings → LDAP in the KUMA web interface and select the tenant that owns the relevant LDAP connection.
The LDAP connections window opens.
- Click the LDAP connection you want to delete and click the Delete button.
The LDAP connection to Active Directory will be deleted.
Page topAuthorizing with domain accounts
To enable users to complete authorization in the KUMA web interface using their own domain account credentials, you must complete the following configuration steps.
- Enable domain authorization if it is disabled.
Domain authorization is enabled by default, but a connection to the domain is not yet configured.
- Configure a connection to the domain controller.
You can connect only to one domain.
- Add groups of user roles.
You can specify an Active Directory group for each KUMA role. After completing authorization using their own domain accounts, users from this group will obtain access to the KUMA web interface in accordance with their defined role.
The program checks whether the Active Directory user group matches the specified filter according to the following order of roles in the KUMA web interface: operator → analyst → tenant administrator → general administrator. Upon the first match, the program assigns a role to the user and does not check any further. If a user matches two groups in the same tenant, the role with the least privileges will be used. If multiple groups are matched for different tenants, the user will be assigned the specified role in each tenant.
If you completed all the configuration steps but the user is unable to use their domain account for authorization in the KUMA web interface, it is recommended to check the configuration for the following issues:
- An email address is not indicated in the properties of the user account in Active Directory. If this is the case, an error message is displayed during the user's first authorization attempt and a KUMA account will not be created.
- There is already an existing local KUMA account with the email address indicated in the domain account properties. If this is the case, the user will see an error message when attempting authorization with the domain account.
- Domain authorization is disabled in the KUMA settings.
- An error was made when entering the group of roles.
- The domain user name contains a space.
Enabling and disabling domain authorization
Domain authorization is enabled by default, but a connection to the Active Directory domain is not yet configured. If you want to temporarily pause domain authorization after configuring a connection, you can disable it in the KUMA web interface without deleting the previously defined values of settings. If necessary, you will be able to enable authorization again at any time.
To enable or disable domain authorization of users in the KUMA web interface:
- In the program web interface, select Settings → Active directory.
- Do one of the following:
- If you want to disable domain authorization, select the Disabled check box in the upper part of the workspace.
- If you want to enable domain authorization, clear the Disabled check box in the upper part of the workspace.
- Click the Save button.
Domain authorization will be enabled or disabled based on your selection.
Page topConfiguring a connection to the domain controller
You can connect only to one Active Directory domain. To do so, you must configure a connection to the domain controller.
To configure a connection to an Active Directory domain controller.
- In the program web interface, select Settings → Active directory.
- In the Connection settings block, in the Base DN field, enter the DistinguishedName of the root record to search for access groups in the Active Directory catalog service.
- In the URL field, indicate the address of the domain controller in the format
<hostname or IP address of server>:<port>.In case of server availability issues, you can specify multiple servers with domain controllers by separating them with commas. All of the specified servers must reside in the same domain.
- In the TLS mode select whether you want to use TLS encryption for domain controllers connection. When using an encrypted connection, it is impossible to specify an IP address as a URL.
- If you enabled TLS encryption at the previous step, add a TLS certificate. To do so:
- If you previously uploaded a certificate, select it from the Secret drop-down list.
If no certificate was previously added, the drop-down list shows No data.
- If you want to upload a new certificate, click the button on the right of the Secret list.
The Secret window opens.
- In the Name field, enter the name that will be displayed in the list of certificates after the certificate is added.
- Click the Upload certificate file button to add the file containing the Active Directory certificate. X.509 certificate public keys in Base64 are supported.
- Click the Save button.
The certificate will be uploaded and displayed in the Secret list.
- If you previously uploaded a certificate, select it from the Secret drop-down list.
- In the Timeout in seconds field, indicate the amount of time to wait for a response from the domain controller server.
If multiple addresses are indicated in the URL field, KUMA will wait the specified amount of seconds for a response from the first server. If no response is received during that time, the program will contact the next server, and so on. If none of the indicated servers responds during the specified amount of time, the connection will be terminated with an error.
- If you want to configure domain authorization for a user with the KUMA general administrator role, specify the DistinguishedName of the Active Directory group containing the user in the General administrator field.
If a user matches two groups in the same tenant, the role with the least privileges will be used.
Filter input example:
CN=KUMA team,OU=Groups,OU=Clients,DC=test,DC=domain. - Click the Save button.
A connection with the Active Directory domain controller is now configured. For domain authorization to work, you must also add filters for KUMA user roles.
Page topAdding user role filters
You can fill in filters only for those roles that require configuration of domain authorization. You can leave the rest of the fields empty.
To add user role filters:
- In the program web interface, select Settings → Active directory.
- In the Role filters settings block, click the Add role filters button.
- In the Tenant drop-down list, select the tenant of the users for whom you want to configure domain authorization.
- In the fields for the following roles, specify the DistinguishedName of the Active Directory group whose users must have the capability to complete authorization with their domain accounts:
- Operator.
- Analyst.
- Administrator.
Input example:
CN=KUMA team,OU=Groups,OU=Clients,DC=test,DC=domain.You can specify only one Active Directory group for each role. If you need to specify multiple groups, you must repeat steps 2–4 for each group while indicating the same tenant.
- If necessary, repeat steps 2–4 for each tenant for which you want to configure domain authorization with operator, analyst, and tenant administrator roles.
- Click the Save button.
User role filters are added. The defined settings will be applied the next time the user logs in to the KUMA web interface.
After the first authorization of the user, information about them is displayed under Settings → Users. The Login and Password fields received from Active Directory will be unavailable for editing. The user role will also be unavailable for editing. To edit a role, you will have to change the user role filters. Changes to a role are applied after the next authorization of the user. The user will continue to operate under the old role until the current session expires.
If the user name or email address is changed in the Active Directory account properties, these changes will need to be manually entered into the KUMA account.
Page topIntegration with RuCERT
In the KUMA web interface, you can create a connection to the National Coordinating Center for Computer Incidents (hereinafter referred to as "RuCERT"). This will let you export incidents registered by KUMA to RuCERT. Integration is configured under Settings → RuCERT in the KUMA web interface.
You can use the Disabled check box to enable or disable integration.
To create a connection to RuCERT:
- In the KUMA web interface, open Settings → RuCERT.
- In the URL field, enter the URL for accessing RuCERT.
- In the Token settings block, create or select an existing secret resource with the API token that was issued to your organization for a connection to RuCERT:
- If you already have a secret, you can select it from the drop-down list.
- If you want to create a new secret:
- Click the button and specify the following settings:
- Name (required)—unique name of the service you are creating. The name must contain from 1 to 128 Unicode characters.
- Token (required)—token that was issued to your organization for a connection to RuCERT.
- Description—service description containing up to 256 Unicode characters.
- Click Save.
The secret containing the token for connecting to RuCERT will be created. It is saved under Resources → Secrets and is owned by the main tenant.
- Click the
The selected secret can be changed by clicking on the
button. - In the Affected system function drop-down list, select the area of activity of your organization.
- In the Company field, indicate the name of your company. This data will be forwarded to RuCERT when incidents are exported.
- Use the Location drop-down list to specify where your company is located. This data will be forwarded to RuCERT when incidents are exported.
- If necessary, in the Proxy settings block, create or select an existing proxy server resource that should be used when connecting to RuCERT.
- Click Save.
KUMA is now integrated with RuCERT. Now you can export incidents to it.
Page top