Contents
Step 8. Configuring the network interface
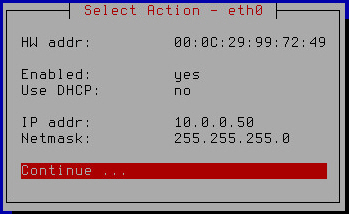
At this step, configure the settings of the Kaspersky Secure Mail Gateway network interface: enable or disable the network interface, assign the IP address and network mask.
Enabling and disabling the network interface
At least one network interface has to be enabled to make configuration of Kaspersky Secure Mail Gateway possible. You may have to disable a network interface if you are using several network interfaces and want to disable one of them temporarily.
To disable a network interface:
- Select the Enabled setting (see figure below).
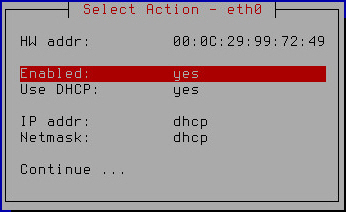
Enabling and disabling the network interface
- Press Enter.
The value of the Enabled setting changes to no.
- Proceed to assign the IP address and network mask (Assigning the IP address and network mask using the DHCP server, Assigning a static IP address and network mask) to finish configuring the network interface.
To enable a network interface:
- Make sure that value of the Enabled setting is set to yes.
The network interface is enabled by default.
- Proceed to assign the IP address and network mask (Assigning the IP address and network mask using the DHCP server, Assigning a static IP address and network mask) to finish configuring the network interface.
Assigning the IP address and network mask using the DHCP server
To assign the IP address and network mask using the DHCP server:
- Make sure that the value of the Use DHCP setting is set to yes (see figure below).
You may need to use the DHCP server for assigning the IP address and network mask if you are configuring Kaspersky Secure Mail Gateway in test mode.
The use of the DHCP server for assigning the IP address and network mask is enabled by default.
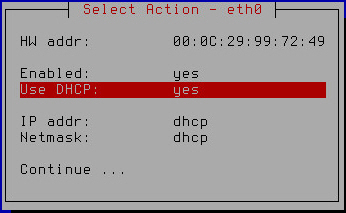
Assigning the IP address and network mask using the DHCP server
- Select Continue.
- Press Enter.
The Initial Configuration Wizard of the Kaspersky Secure Mail Gateway virtual machine proceeds to the next step.
Assigning a static IP address and network mask
To assign a static IP address and network mask:
- Select the Use DHCP setting (see figure below).
Assigning a static IP address and network mask is recommended if you are configuring Kaspersky Secure Mail Gateway in production mode.
Assigning a static IP address and network mask
- Press Enter.
A window opens prompting you to confirm assignment of static settings for the network interface (see figure below).
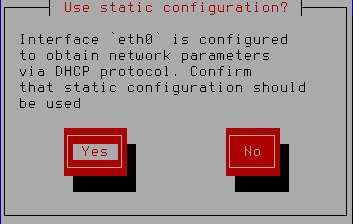
Confirming assignment of static settings for the network interface
- Click Yes.
A window for entering the static IP address and network mask opens (see figure below).
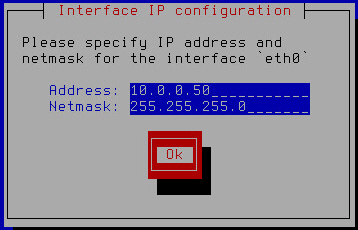
Specifying a static IP address and network mask
- In the Address field, type the IP address that you want to assign for Kaspersky Secure Mail Gateway.
- In the Netmask field, type the mask of the network on which you are using Kaspersky Secure Mail Gateway.
- Click OK.
The Initial Configuration Wizard of Kaspersky Secure Mail Gateway returns to the network interface configuration window (see figure below).
Finishing configuration of the network interface
- Verify that the network settings are correct.
- Select Continue.
- Press Enter.
The Initial Configuration Wizard of the Kaspersky Secure Mail Gateway virtual machine proceeds to the next step.