Contents
- Working in a cloud environment
- About work in a cloud environment
- Checking configuration
- Cloud device group
- Cloud Environment Configuration Wizard
- About the Cloud Environment Configuration Wizard
- Step 1. Selecting the application activation method
- Step 2. Selecting the cloud environment
- Step 3. Authorization in the cloud environment
- Step 4. Configuring synchronization with Cloud and choosing further actions
- Step 5. Configuring Kaspersky Security Network in the cloud environment
- Step 6. Configuring email notifications in the cloud environment
- Step 7. Creating an initial configuration of the protection of the cloud environment
- Step 8. Selecting the action when the operating system must be restarted during installation (for the cloud environment)
- Step 9. Receiving updates by the Administration Server
- Creating installation packages required for Cloud Environment Configuration Wizard
- Database options for work in a cloud environment
- Deployment of Kaspersky Security Center in Yandex.Cloud
- Hardware requirements for the Administration Server in a cloud environment
- Installing applications on devices in a cloud environment
- Licensing options in a cloud environment
- Network segment polling
- Prerequisites for client devices in a cloud environment necessary for work with Kaspersky Security Center
- Prerequisites for deploying Kaspersky Security Center in a cloud environment
- Scenario: Deployment for cloud environment
- Synchronization with cloud
- Using deployment scripts for deploying security applications
- Viewing the properties of cloud devices
- Working in Amazon Web Services cloud environment
- About work in Amazon Web Services cloud environment
- Creating IAM roles and IAM user accounts for Amazon EC2 instances
- Ensuring that the Kaspersky Security Center Administration Server has the permissions to work with AWS
- Creating an IAM role for the Administration Server
- Creating an IAM user account for work with Kaspersky Security Center
- Creating an IAM role for installation of applications on Amazon EC2 instances
- Working with Amazon RDS
- Working in Google Cloud
- Working in Microsoft Azure cloud environment
Working in a cloud environment
This section provides information about Kaspersky Security Center deployment and maintenance in cloud environments, such as Amazon Web Services, Microsoft Azure, or Google Cloud.
The addresses of web pages cited in this document are correct as of the Kaspersky Security Center release date.
About work in a cloud environment
Kaspersky Security Center 13.1 not only works with on-premises devices, but also provides special features for working in a cloud environment. Kaspersky Security Center works with the following virtual machines:
- Amazon EC2 instances (hereinafter, also referred to as instances). An Amazon EC2 instance is a virtual machine that is created on the basis of the Amazon Web Services (AWS) platform. Kaspersky Security Center uses AWS API (Application Programming Interface).
- Microsoft Azure virtual machines. Kaspersky Security Center uses Azure API.
- Google Cloud virtual machines instances. Kaspersky Security Center uses Google API.
You can deploy Kaspersky Security Center on an instance or a virtual machine to manage protection of devices in a cloud environment and to use special features of Kaspersky Security Center for work in a cloud environment. These features include:
- Using API tools to poll devices in a cloud environment
- Using API tools to install Network Agent and security applications on devices in a cloud environment
- Searching devices based on whether they belong to a specific cloud segment
You can also use an instance or a virtual machine on which a Kaspersky Security Center Administration Server is deployed to protect on-premises devices (for example, if a cloud server turns out to be easier for you to service and maintain than a physical one). If this is the case, you work with the Administration Server in the same way that you would if the Administration Server were installed on an on-premises device.
In a Kaspersky Security Center that has been deployed from a paid Amazon Machine Image (AMI) (in AWS) or a usage-based monthly billed SKU (in Azure), Vulnerability and Patch Management (including integration with SIEM systems) is automatically activated; Mobile Device Management cannot be activated.
The Administration Server is installed together with Administration Console. Kaspersky Security for Windows Server is also automatically installed on the device on which the Administration Server is installed.
You can use Cloud Environment Configuration Wizard to configure Kaspersky Security Center, taking into account the specifics of working in a cloud environment.
Checking configuration
To check whether Kaspersky Security Center 13.1 is properly configured for working in a cloud environment:
- Start Kaspersky Security Center and make sure that you can connect to the Administration Server via the Administration Console.
- In the console tree, select Managed devices\Cloud.
- When viewing any of the subgroups in the Managed devices\Cloud group, make sure that the Devices tab displays all devices of that subgroup.
If the devices are not displayed, you can poll the corresponding cloud segments manually to find them.
- Make sure that the Policies tab has active policies for the following applications:
- Kaspersky Security Center Network Agent
- Kaspersky Security for Windows Server
- Kaspersky Endpoint Security for Linux
If they are not listed, you can create them manually.
- Make sure that the Tasks tab lists the following tasks:
- Backup of Administration Server data
- Update task for Windows Server
- Database maintenance
- Download updates to the Administration Server repository
- Find vulnerabilities and required updates
- Install protection for Windows
- Install protection for Linux
- Quick scan task for Windows Server
- Quick Scan
- Install updates for Linux
If they are not listed, you can create them manually.
Kaspersky Security Center 13.1 is properly configured for work in a cloud environment.
Cloud device group
You can manage cloud devices by combining them into groups. At the stage of initially configuring Kaspersky Security Center, the Managed devices\Cloud administration group is created by default, and cloud devices detected during polling are placed into this group.
If you selected the Synchronize administration group structure with the cloud segment option when you configured synchronization, the structure of subgroups in this administration group is identical to the structure of your cloud segments. (However, in AWS, availability zones and placement groups are not represented in the structure; in Microsoft Azure, subnets are not represented in the structure.) Empty subgroups within the group that are detected during polling are automatically deleted.
You can also manually create administration groups by combining all or specific devices.
By default, the Managed devices\Cloud group inherits the policies and tasks from the Managed devices group. You can change the settings if the Editing allowed check boxes are selected in the properties of the settings of the corresponding policies and tasks.
Cloud Environment Configuration Wizard
To configure Kaspersky Security Center by using this Wizard, you must have the following:
- Specific credentials for a cloud environment:
- An IAM role that has been granted the right to poll the cloud segment or an IAM user account that has been granted the right to poll the cloud segment (for work with Amazon Web Services)
- Azure Application ID, password, and subscription (for work with Microsoft Azure)
- Google client email, Project ID, and private key (for work with Google Cloud)
If you do not want to use cloud environment capabilities (if, for example, you want to manage protection of physical client devices only), you can close the Cloud Environment Configuration Wizard and run the standard Administration Server Quick Start Wizard manually.
The Cloud Environment Configuration Wizard starts automatically at the first connection to Administration Server through Administration Console if you are deploying Kaspersky Security Center from a ready-to-use image. You can also start the Cloud Environment Configuration Wizard manually at any time.
To start the Cloud Environment Configuration Wizard manually:
- In the console tree, select the Administration Server node.
- In the context menu of the node, select All Tasks → Cloud Environment Configuration Wizard.
The average work session with this Wizard lasts about 15 minutes.
About the Cloud Environment Configuration Wizard
This Wizard allows you to configure Kaspersky Security Center while taking into account the specifics of working in a cloud environment.
The Wizard creates the following objects:
- Network Agent policy with default settings
- Policy for Kaspersky Endpoint Security for Linux
- Policy for Kaspersky Security for Windows Server
- Administration group for instances and a rule for automatically moving instances to this administration group
- Administration Server data backup task
- Tasks for installing protection on devices running Linux and Windows
- Tasks for each managed device:
- Quick Virus Scan
- Update download
If you selected the BYOL licensing option, the Wizard also activates Kaspersky Security Center with a key file or activation code and places the key file or activation code in the license storage.
Step 1. Selecting the application activation method
This step is not displayed if you signed up for one of the ready-to-use AMIs (at the AWS Marketplace), or for a Usage-based monthly billed SKU (at the Azure Marketplace). In this case, the Wizard immediately proceeds to the next step. However, you cannot purchase a ready-to-use AMI for Google Cloud.
If you selected BYOL licensing option for Kaspersky Security Center, the Wizard prompts you to select the application activation method.
Activate the application with an activation code (or a key file) for Kaspersky Security for Virtualization or for Kaspersky Hybrid Cloud Security.
You can activate the application in one of the following ways:
- By entering an activation code.
Online activation will start. This process involves verification of the specified activation code, as well as issuance and activation of a key file.
- By specifying a key file.
The application will check the key file and either activate it if it contains the correct information, or prompt you to specify another key file.
Kaspersky Security Center places the license key in the license storage and marks it as automatically distributed on managed devices.
If you connect to an instance using standard Remote Desktop Connection in Microsoft Windows or a similar application, in the remote connection properties you must specify the drive of the physical device that you are using to connect. This ensures access from the instance to the files on your physical device, and lets you select and specify the key file.
When working with Kaspersky Security Center deployed from a paid AMI or for a Usage-based monthly billed SKU, you cannot add key files or activation codes to the license storage.
Step 2. Selecting the cloud environment
Select the cloud environment in which you are deploying Kaspersky Security Center: AWS, Azure, or Google Cloud.
Step 3. Authorization in the cloud environment
AWS
If you selected AWS, either specify that you have an IAM role with the required rights, or provide Kaspersky Security Center with an AWS IAM access key. Cloud segment polling is not possible without an IAM role or an AWS IAM access key.
Specify the following settings for the connection that will be used for further polling of the cloud segment:
This connection is saved in the application settings. The Cloud Environment Configuration Wizard allows you to create only a single AWS IAM access key. Subsequently, you can specify more connections to manage other cloud segments.
If you want to install applications on instances through Kaspersky Security Center, you must make sure that your IAM role (or the IAM user whose account is associated with the key that you are entering) has all the necessary permissions.
Azure
If you selected Azure, specify the following settings for the connection that will be used for further polling the cloud segment:
- Connection name
- Azure Application ID
- Azure Subscription ID
- Azure Application password
- Azure storage account name
- Azure storage access key
This connection is saved in the application settings.
Google Cloud
If you selected Google Cloud, specify the following settings for the connection that will be used for further polling the cloud segment:
This connection is saved in the application settings.
Step 4. Configuring synchronization with Cloud and choosing further actions
At this step, cloud segment polling starts and a special administration group for instances is created. The instances found during polling are placed into this group. The cloud segment polling schedule is configured (every 5 minutes by default).
A Synchronize with Cloud automatic moving rule is also created. For each subsequent scan of the cloud network, virtual devices detected will be moved to the corresponding subgroup within the Managed devices\Cloud group.
On the Synchronization with the cloud segment page, you can define the following settings:
For Google Cloud, you can only perform the deployment with Kaspersky Security Center native tools. If you selected Google Cloud, the Deploy protection option is not available.
Step 5. Configuring Kaspersky Security Network in the cloud environment
Specify the settings for relaying information about Kaspersky Security Center operations to the Kaspersky Security Network knowledge base. Select one of the following options:
Kaspersky recommends participation in Kaspersky Security Network.
Step 6. Configuring email notifications in the cloud environment
Configure the delivery of notifications about events registered during the operation of Kaspersky applications on virtual client devices. These settings will be used as the default settings for application policies.
To configure the delivery of notifications about events occurring in Kaspersky applications, use the following settings:
You can test the new email notification settings by clicking the Send test message button. If the test message was successfully received at the addresses specified in the Recipients (email addresses) field, the settings have been correctly configured.
Step 7. Creating an initial configuration of the protection of the cloud environment
At this step, Kaspersky Security Center automatically creates policies and tasks. The Configure initial protection window displays a list of policies and tasks created by the application.
If you use an RDS database in the AWS cloud environment, you have to provide IAM access key pair to Kaspersky Security Center when the Administration Server backup task is being created. In this case, fill in the following fields:
If you use an Azure SQL database in the Azure cloud environment, you have to provide information about your Azure SQL Server to Kaspersky Security Center when the Administration Server backup task is being created. In this case, fill in the following fields:
- Azure storage account name
- Azure Subscription ID
- Azure Application password
- Azure Application ID
- Azure SQL server name
- Azure SQL server resource group
- Azure storage access key
If you are deploying the Administration Server in the Google Cloud, you have to select a folder where the backup copies will be stored. Select a folder on your local device or a folder on a virtual machine instance.
The Next button becomes available after the creation of all policies and tasks that are necessary for minimum configuration of protection.
If a device on which the tasks are supposed to run is not visible to the Administration Server, then the tasks start only when the device becomes visible. If you create a new EC2 instance or a new Azure virtual machine, it might take some time before it becomes visible to the Administration Server. If you want Network Agent and the security applications to be installed on all the newly created devices as soon as possible, make sure that the Run missed tasks option is enabled for the Install application remotely tasks. Otherwise, a newly created instance/virtual machine will not get Network Agent and the security applications until the task starts according to its schedule.
Step 8. Selecting the action when the operating system must be restarted during installation (for the cloud environment)
If you previously selected Deploy protection, you must choose what to do when the operating system of a target device has to be restarted. If you did not select the Deploy protection option, this step is skipped.
Select whether to restart instances if the device operating system has to be restarted during installation of applications:
If you want to force the closing of all applications in blocked sessions on the instances before the restart, select the Force closure of applications in blocked sessions check box. If this check box is cleared, you will have to close manually all applications that are running on blocked instances.
Step 9. Receiving updates by the Administration Server
At this step, you can view the progress of downloading updates necessary for correct operation of the Administration Server. You can click the Next button, without waiting for download completion, to proceed to the final page of the Wizard.
The Wizard finishes.
Creating installation packages required for Cloud Environment Configuration Wizard
Cloud Environment Configuration Wizard in Kaspersky Security Center is available if you have the installation packages and management plug-ins for the following programs:
- Kaspersky Security for Windows Server
- Kaspersky Endpoint Security for Linux
These installation packages are required for installing Kaspersky Security for Windows Server and Kaspersky Endpoint Security for Linux on the instances or virtual machines that you want to protect. If you do not have these installation packages, you must create them. Otherwise, the Wizard cannot work.
To create installation packages:
- Download the latest versions of the applications and plug-ins at the Kaspersky website:
- The installer and the management plug-in for Kaspersky Security for Windows Server.
- The installer, files for remote installation via Kaspersky Security Center, and the management plug-in for Kaspersky Endpoint Security for Linux.
- Save all files on the instance (or virtual machine) where the Administration Server is installed.
- Extract the files from all the packages.
- Start Kaspersky Security Center.
- In the console tree, go to Advanced → Remote installation → Installation packages and click Create installation package.
- Select Create Kaspersky installation package.
- Specify the name for the package and the path to the application installer: <folder>\<file name>.kud, and then click Next.
- Read the End User License Agreement and select the check box confirming that you accept its terms, and then click Next.
The installation package will be uploaded to the Administration Server and will be available in the list of installation packages.
The Cloud Environment Configuration Wizard will become available as soon as you create the installation packages and install the management plug-ins for Kaspersky Security for Windows Server and Kaspersky Endpoint Security for Linux on the Administration Server.
Database options for work in a cloud environment
You must have a database to work with Kaspersky Security Center. When deploying Kaspersky Security Center in AWS, in Microsoft Azure, or Google Cloud, you have three options:
- Create a local database on the same device with the Administration Server. Kaspersky Security Center comes with a SQL Server Express database that can support up to 5000 managed devices. Choose this option if SQL Server Express Edition is enough for your needs.
- Create a database with the Relational Database Service (RDS) in the AWS cloud environment, or with the Azure Database service in the Microsoft Azure cloud environment. Choose this option if you want a DBMS other than SQL Express. Your data will be transferred inside the cloud environment, where it will remain, and you will not have any extra expenses. If you already work with Kaspersky Security Center on premises and have some data in your database, you can transfer your data to the new database.
For work on Google Cloud Platform, you can only use Cloud SQL for MySQL.
- Use an existing database server. Choose this option if you already have a database server and want to use it for Kaspersky Security Center. If this server is outside the cloud environment, your data will be transferred over the internet, which might result in extra expenses.
The procedure of Kaspersky Security Center deployment in the cloud environment has a special step for creating (choosing) a database.
Deployment of Kaspersky Security Center in Yandex.Cloud
You can deploy Kaspersky Security Center in Yandex.Cloud. Only the pay-per-use mode is available; cloud databases are not supported.
In Yandex.Cloud, the following deployment methods for the security applications are available:
- By native means of Kaspersky Security Center, that is, via the Remote installation task (the deployment of the security programs is only possible if Administration Server and the virtual machines to be protected are on the same network segment)
- Via deployments scripts
For deployment of Kaspersky Security Center in Yandex.Cloud, you must have a service account in Yandex.Cloud. You must give this account the marketplace.meteringAgent permission and associate this account with the virtual machine (please refer to https://cloud.yandex.com/en for details).
Hardware requirements for the Administration Server in a cloud environment
For deployment in cloud environments, the requirements for Administration Server and database server are the same as the requirements for physical Administration Server (depending on how many devices you want to manage). Please refer to the documentation of the cloud environment for details.
Installing applications on devices in a cloud environment
You can install the following Kaspersky applications on the devices in a cloud environment: Kaspersky Security for Windows Server (for Windows devices) and Kaspersky Endpoint Security for Linux (for Linux devices).
Client devices on which you intend to install protection must meet the requirements for Kaspersky Security Center operation in a cloud environment. You must have a valid license to install applications on AWS instances, Microsoft Azure virtual machines or Google virtual machine instances.
Kaspersky Security Center 13.1 supports the following scenarios:
- A client device is discovered by means of an API; the installation is also performed by means of an API. For AWS and Azure cloud environments, this scenario is supported.
- A client device is discovered by means of Active Directory polling, Windows domains polling, or IP range polling; the installation is performed by means of Kaspersky Security Center.
- A client device is discovered by means of Google API; the installation is performed by means of Kaspersky Security Center. For Google Cloud, only this scenario is supported.
Other ways of installation of the applications are not supported.
To install applications on virtual devices, use installation packages.
To create a task for remote installation of the application on instances by using AWS API or Azure API:
- In the console tree, select the Tasks folder.
- Click the New task button.
The Add Task Wizard starts. Follow the instructions of the Wizard.
- On the Select the task type page, select Install application remotely as the task type.
- On the Select devices page, select the relevant devices from the Managed devices\Cloud group.
- If Network Agent has not yet been installed on the devices on which you are intending to install the application, on the Selecting an account to run the task page select Account required (Network Agent is not used) and click the Add button in the right part of the window. In the menu that appears, select one of the following:
You can provide multiple credentials by clicking the Add button for each new one. If different cloud segments require different credentials, provide the credentials for all the segments.
After the Wizard finishes, the task for remote installation of the application appears in the list of tasks in the workspace of the Tasks folder.
In Microsoft Azure, remote installation of security applications on a virtual machine may result in deleting Custom Script Extension installed on this virtual machine.
Licensing options in a cloud environment
Work in a cloud environment is outside the basic functionality of Kaspersky Security Center and therefore requires a dedicated license.
Two Kaspersky Security Center licensing options are available for working in a cloud environment:
- Paid AMI (in Amazon Web Services) or Usage-based monthly billed SKU (in Microsoft Azure).
This grants a license for Kaspersky Security Center as well as licenses for Kaspersky Endpoint Security for Linux and Kaspersky Security for Windows Server. You have to pay according to the rules of the cloud environment that you use.
This model lets you have not more than 200 client devices for one Administration Server.
- A free-of-charge, ready-to-use image using a proprietary license, according to the Bring Your Own License (BYOL) model.
For Kaspersky Security Center licensing in AWS or Azure, you must have a license for one of the following applications:
- Kaspersky Security for Virtualization
- Kaspersky Hybrid Cloud Security
The BYOL model lets you have up to 100,000 client devices for one Administration Server. This model also lets you manage devices outside the AWS, Azure, or Google environment.
You can choose the BYOL model in any of the following cases:
- You already own a valid license for Kaspersky Security for Virtualization.
- You already own a valid license for Kaspersky Hybrid Cloud Security.
- You are willing to purchase a license immediately before deployment of Kaspersky Security Center.
At the stage of initial setup, Kaspersky Security Center prompts you for an activation code or key file.
If you choose BYOL, you will not have to pay for Kaspersky Security Center through Azure Marketplace or AWS Marketplace.
In both cases, Vulnerability and Patch Management is automatically activated, and Mobile Device Management cannot be activated.
You may encounter an error when trying to activate the feature Support of the cloud environment using the license for Kaspersky Hybrid Cloud Security.
Upon subscribing to Kaspersky Security Center, you get an Amazon Elastic Compute Cloud (Amazon EC2) instance or a Microsoft Azure virtual machine with Kaspersky Security Center Administration Server. The installation packages for Kaspersky Security for Windows Server and Kaspersky Endpoint Security for Linux are available on the Administration Server. You can install these applications on devices in the cloud environment. You do not have to license these applications.
If a managed device is not visible to the Administration Server for more than a week, the application (Kaspersky Security for Windows Server or Kaspersky Endpoint Security for Linux) on the device will shift to limited functionality mode. To activate the application again, you have to make the device on which the application is installed visible to the Administration Server again.
Network segment polling
Information about the structure of the network and devices in this network is received by the Administration Server through regular polling of cloud segments by using AWS API, Azure API, or Google API tools. Kaspersky Security Center uses this information to update the contents of the Unassigned devices and Managed devices folders. If you have configured devices to be moved to administration groups automatically, the detected devices are included in administration groups.
To allow the Administration Server to poll cloud segments, you must have the rights provided with an IAM role or IAM user account (in AWS), or with Application ID and password (in Azure), or with a Google client email, Google project ID, and private key.
You can add and delete connections, as well as set the polling schedule for each cloud segment.
Adding connections for cloud segment polling
To add a connection for cloud segment polling to the list of available connections:
- In the console tree, select the Device discovery → Cloud node.
- In the workspace of the window, click Configure polling.
A properties window opens containing a list of connections available for cloud segment polling.
- Click the Add button.
The Connection window opens.
- Specify the name of the cloud environment for the connection that will be used for further polling of the cloud segment:
If you selected AWS, specify the following settings:
The Cloud Environment Configuration Wizard allows you to specify only a single AWS IAM access key. Subsequently, you can specify more connections to manage other cloud segments.
If you selected Azure, specify the following settings:
- Connection name
- Azure Application ID
- Azure Subscription ID
- Azure Application password
- Azure storage account name
- Azure storage access key
If you selected Google Cloud, specify the following settings:
- If you want, select Set polling schedule and change the default settings.
The connection is saved in the application settings.
After the new cloud segment is polled for the first time, the subgroup corresponding to that segment appears in the Managed devices\Cloud administration group.
If you specify incorrect credentials, no instances will be found during cloud segment polling and a new subgroup will not appear in the Managed devices\Cloud administration group.
Deleting connections for cloud segment polling
If you no longer have to poll a specific cloud segment, you can delete the connection corresponding to that segment from the list of available connections. You can also delete a connection if, for example, permissions to poll a cloud segment have been transferred to another AWS IAM user with a different key.
To delete a connection:
- In the console tree, select the Device discovery → Cloud node.
- In the workspace of the window, select Configure polling.
A window opens containing a list of connections available for cloud segment polling.
- Select the connection that you want to delete and click the Delete button in the right part of the window.
- In the window that opens, click the OK button to confirm your selection.
If you are deleting connections from the list of available connections, the devices that are in the corresponding segments are automatically deleted from the corresponding administration groups.
Configuring the polling schedule
Cloud segment polling is performed according to schedule. You can set the polling frequency.
The polling frequency is automatically set at 5 minutes by the Cloud Environment Configuration Wizard. You can change this value at any time and set a different schedule. However, it is not recommended to configure polling to run more frequently than every 5 minutes, because this could lead to errors in the API operation.
To configure a cloud segment polling schedule:
- In the console tree, select the Device discovery → Cloud node.
- In the workspace, click Configure polling.
The cloud properties window opens.
- In the list, select the connection you want and click the Properties button.
The connection properties window opens.
- In the properties window, click the Set polling schedule link.
The Schedule window opens.
- Define the following settings:
- Scheduled start
Polling schedule options:
- Run missed tasks
- Scheduled start
- Click OK to save the changes.
The polling schedule is configured and saved.
Prerequisites for client devices in a cloud environment necessary for work with Kaspersky Security Center
The devices on which you intend to install Administration Server, Network Agent, and Kaspersky security applications must meet the following conditions:
- The configuration of security groups makes available the following ports on the Administration Server (minimum set of ports required for deployment):
- 8060 HTTP—For transfer of Network Agent installation packages and security application installation packages from the Administration Server to protected instances
- 8061 HTTPS—For transfer of Network Agent installation packages and security application installation packages from the Administration Server to protected instances
- 13000 TCP—For transfers from protected instances and secondary Administration Servers to the primary Administration Server using SSL
- 13000 UDP—For transfer of information about shutdown of instances to the Administration Server
- 14000 TCP—For transfers from protected instances and secondary Administration Servers to the primary Administration Server without using SSL
- 13291—For connecting Administration Console to the Administration Server
- 40080—For the operation of deployment scripts
You can configure security groups in AWS Management Console or at the Azure portal. If you intend to use Kaspersky Security Center in a non-default configuration, please refer to the Knowledge Base. Examples of non-default configurations include not installing Administration Console on the Administration Server device but installing it on your workstation instead, or using a KSN proxy server.
- Port 15000 UDP is available on the client devices (for receipt of requests for communication with the Administration Server).
- In the AWS cloud environment:
- If you plan to use AWS API, the IAM role is set under which the applications will be installed on the instances.
- On each Amazon EC2 instance, Systems Manager Agent (SSM Agent) is installed and running.
- SSM Agent enables Kaspersky Security Center to automatically install applications on devices and groups of devices without requesting confirmation by an administrator each time.
- On instances that are running a Windows operating system and were deployed from AMIs later than November 2016, SSM Agent is installed and running. You will have to manually install SSM Agent on all other devices. For details about installing SSM Agent on devices running Windows and Linux operating systems, please refer to the AWS Help page.
- In the Microsoft Azure cloud environment:
- On each Azure virtual machine, Azure VM Agent is installed and running.
By default, a new virtual machine is created with Azure VM Agent, and you do not have to install or enable it manually. Please refer to Microsoft Help pages for details about Azure VM Agent on Windows devices and on Linux devices.
- Your Azure Application ID has the following roles:
- Reader (to discover virtual machines by using polling)
- Virtual Machine Contributor (to deploy protection on the virtual machines)
- SQL Server Contributor (to use an SQL database in the Microsoft Azure environment)
If you want to perform all these operations, assign all the three roles to your Azure Application ID.
- On each Azure virtual machine, Azure VM Agent is installed and running.
Prerequisites for deploying Kaspersky Security Center in a cloud environment
Before starting deployment of Kaspersky Security Center in the Amazon Web Services or Microsoft Azure cloud environment, make sure that you have the following:
- Internet access
- One of the following accounts:
- Amazon Web Services account (for work with AWS)
- Microsoft account (for work with Azure)
- Google account (for work with Google Cloud)
- One of the following:
- License for Kaspersky Security for Virtualization
- License for Kaspersky Hybrid Cloud Security
- Funds to purchase such a license (Kaspersky Security for Virtualization or Kaspersky Hybrid Cloud Security)
- Funds to pay for a ready-to-use image at the Azure Marketplace
- Guides for the latest versions of Kaspersky Endpoint Security for Linux and Kaspersky Security for Windows Server
Scenario: Deployment for cloud environment
This section describes the deployment of Kaspersky Security Center for working in cloud environments such as Amazon Web Services, Microsoft Azure, and Google Cloud.
After you finish the deployment scenario, Kaspersky Security Center Administration Server and Administration Console are started and configured with the default parameters. Anti-Virus protection managed by Kaspersky Security Center is deployed on the selected Amazon EC2 instances or Microsoft Azure virtual machines. You can then fine-tune the configuration of Kaspersky Security Center, create a complex structure of administration groups, and create various policies and tasks for groups.
The deployment of Kaspersky Security Center for working in cloud environments consists of the following parts:
- Preparation work
- Deploying Administration Server
- Installing Kaspersky anti-virus applications on virtual devices that need to be protected
- Configuring the update download settings
- Configuring the settings for managing reports about the protection status of devices
The Cloud Environment Configuration Wizard is intended for performing the initial configuration. It starts automatically the first time that Kaspersky Security Center is deployed from a ready-to-use image. You can manually start the Wizard at any time. In addition, you can manually perform all of the actions that the Wizard performs.
We recommend that you plan for a minimum of one hour for deploying Kaspersky Security Center Administration Server in the cloud environment and at least one working day for protection deployment in the cloud environment.
Deployment of Kaspersky Security Center in the cloud environment proceeds in stages:
- Planning the configuration of cloud segments
Learn how Kaspersky Security Center works in a cloud environment. Plan where Administration Server will be deployed (inside or outside of the cloud environment); and determine how many cloud segments you plan to protect. If you are planning to deploy Administration Server outside of the cloud environment or if you are planning to protect more than 5000 devices, you will need to install Administration Server manually.
To work with Google Cloud, you can only install Administration Server manually.
- Planning the resources
Make sure that you have everything that is required for deployment.
- Subscribing to Kaspersky Security Center as a ready-to-use image
Select one of the ready-to-use AMIs at AWS Marketplace or select a Usage-based monthly billed SKU at Azure Marketplace, pay for it according to marketplace rules if necessary (or use the BYOL model), and then use the image to deploy an Amazon EC2 instance or Microsoft Azure virtual machine with Kaspersky Security Center installed.
This stage is necessary only if you plan to deploy Administration Server on an instance or a virtual machine within a cloud environment and you are also planning to deploy protection for no more than 5000 devices. Otherwise, this stage is not necessary and instead you manually have to install Administration Server, Administration Console, and the DBMS.
This step is unavailable for Google Cloud.
- Determining the location of the DBMS
Determine where your DBMS will be.
If you plan to use a database outside the cloud environment, make sure that you have a working database.
If you plan to use Amazon Relational Database Service (RDS), create a database with RDS in the AWS cloud environment.
If you plan to use Microsoft Azure SQL DBMS, create a database with the Azure Database service in the Microsoft Azure cloud environment.
If you plan to use Google MySQL, create a database in the Google Cloud (Please refer to https://cloud.google.com/sql/docs/mysql for details).
- Installing Administration Server and Administration Console (Microsoft Management Console based and/or web-based Console) on selected devices manually
Install Administration Server, Administration Console, and the DBMS on the selected devices, as described in the main installation scenario for Kaspersky Security Center.
This stage is necessary if you plan to place Administration Server outside of a cloud environment or if you plan to deploy protection for more than 5000 devices. Then make sure that your Administration Server meets hardware requirements. Otherwise, this stage is not necessary and a subscription to Kaspersky Security Center as a ready-to-use image in AWS Marketplace, Azure Marketplace, or Google Cloud is sufficient.
- Ensuring that Administration Server has the permissions to work with cloud APIs
In AWS, go to the AWS Management Console and create an IAM role or an IAM user account. The created IAM role (or IAM user account) will allow Kaspersky Security Center to work with the AWS API: Poll cloud segments and deploy protection.
In Azure, create a subscription and an Application ID with password. Kaspersky Security Center uses these credentials to work with the Azure API: Poll cloud segments and deploy protection.
In Google Cloud, register a project, get your project ID and a private key. Kaspersky Security Center uses these credentials to poll cloud segments by using the Google API.
- Creating an IAM role for protected instances (for AWS only)
In the AWS Management Console, create an IAM role that defines the set of permissions for executing requests to AWS. This newly created role will be subsequently assigned to new instances. The IAM role is required in order to use Kaspersky Security Center to install applications on instances.
- Preparing a database by using Amazon Relational Database Service or Microsoft Azure SQL
If you plan to use Amazon Relational Database Service (RDS), create an Amazon RDS database instance and an S3 bucket on which the database backup will be stored. You can skip this stage if you want a database on the same EC2 instance where Administration Server is installed or if you want your database to be located somewhere else.
If you plan to use Microsoft Azure SQL, create a storage account and a database in Microsoft Azure.
If you plan to use Google MySQL, configure your database in the Google Cloud. (Please refer to https://cloud.google.com/sql/docs/mysql for details.)
- Licensing Kaspersky Security Center for working in the cloud environment
Make sure that you have licensed Kaspersky Security Center to work in the cloud environment and provide an activation code or key file so that the application can add it to license storage. This stage can be completed in the Cloud Environment Configuration Wizard.
This stage is required if you are using Kaspersky Security Center installed from a free ready-to-use AMI based on the BYOL model or if you are manually installing Kaspersky Security Center without the use of AMIs. In each of these cases, you will need a license for Kaspersky Security for Virtualization or a license for Kaspersky Hybrid Cloud Security, to activate Kaspersky Security Center.
If you are using Kaspersky Security Center installed from a ready-to-use image, this stage is not necessary and the corresponding window of the Cloud Environment Configuration Wizard is not displayed.
- Authorization in the cloud environment
Provide Kaspersky Security Center with your AWS, Azure, or Google Cloud credentials so that Kaspersky Security Center can operate with the necessary permissions. This stage can be completed in the Cloud Environment Configuration Wizard.
- Polling a cloud segment so that Administration Server can receive information about devices in the cloud segment
Start cloud segment polling. In the AWS environment, Kaspersky Security Center will receive the addresses and names of all instances that can be accessed, based on the permissions of the IAM role or IAM user. In the Microsoft Azure environment, Kaspersky Security Center will receive the addresses and names of all virtual machines that can be accessed, based on the permissions of the Reader role.
You can then use Kaspersky Security Center to install Kaspersky applications and software from other vendors on the detected instances or virtual machines.
Kaspersky Security Center regularly starts a poll, which means that new instances or virtual machines are automatically detected.
- Combining all network devices into the Cloud administration group
Move the discovered instances or virtual machines into the Managed devices\Cloud administration group so that they can become available for centralized management. If you want to assign devices to subgroups, for example, depending on which operating system is installed on them, you can create several administration groups within the Managed devices\Cloud group. You can enable automatic moving of all devices that will be detected during routine polls to the Managed devices\Cloud group.
- Using Network Agent to connect networked devices to Administration Server
Install Network Agent on devices in the cloud environment. Network Agent is the Kaspersky Security Center component that provides for communication between devices and Administration Server. Network Agent settings are configured automatically by default.
You can install Network Agent on each device locally. You can also install Network Agent on devices remotely using Kaspersky Security Center. Or, you can skip this stage and install Network Agent together with the latest versions of the security applications.
- Installing the latest versions of security applications on networked devices
Select the devices on which you want to install security applications, and then install the latest versions of security applications on those devices. You can perform the installation either remotely using Kaspersky Security Center on Administration Server or locally.
You may have to create installation packages for these programs manually.
Kaspersky Endpoint Security for Linux is intended for instances and virtual machines running Linux.
Kaspersky Security for Windows Server is intended for instances and virtual machines running Windows.
- Configuring update settings
The Find vulnerabilities and required updates task is created automatically when Cloud Environment Configuration Wizard is run. You can also create the task manually. This task automatically finds and downloads required application updates for subsequent installation to network devices using Kaspersky Security Center tools.
It is recommended to complete the following stage after Cloud Environment Configuration Wizard finishes:
- Configuring report management
You can view reports on the Monitoring tab in the workspace of the Administration Server node. You can also receive reports by email. Reports on the Monitoring tab are available by default. To configure the receipt of reports by email, specify the email addresses that should receive reports, and then configure the format of reports.
Results
Upon completion of the scenario, you can make sure that the initial configuration was successful:
- You can connect to Administration Server through Administration Console or Kaspersky Security Center 13.1 Web Console.
- The latest versions of Kaspersky security applications are installed and running on managed devices.
- Kaspersky Security Center has created the default policies and tasks for all managed devices.
Synchronization with cloud
During the Cloud Environment Configuration Wizard operation, the Synchronize with Cloud rule is created automatically. This rule allows you to automatically move instances detected in each poll, from the Unassigned devices group to the Managed devices\Cloud group, to make these instances available for centralized management. By default, the rule is active after it is created. You can disable, modify, or enforce the rule at any time.
To edit the properties of the Synchronize with Cloud rule and/or enforce the rule:
- In the console tree, right-click the name of the Device discovery node.
- In the context menu, select Properties.
- In the Properties window that opens, in the Sections pane, select Move devices.
- In the list of device moving rules in the workspace, select Synchronize with Cloud and then click the Properties button in the lower part of the window.
The rule properties window opens.
- If necessary, specify the following settings in the Cloud segments settings group:
- Device is in cloud segment
- Include child objects
- Move devices from nested objects to corresponding subgroups
- Create subgroups corresponding to containers of newly detected devices
- Delete subgroups for which no match is found in the cloud segments
If you enabled the Synchronize with Cloud option when running the Cloud Environment Configuration Wizard, the Synchronize with Cloud rule is created with the Create subgroups corresponding to containers of newly detected devices and Delete subgroups for which no match is found in the cloud segments check boxes selected.
If you did not enable Synchronize with Cloud option, the Synchronize with Cloud rule is created with these options disabled (cleared). If your work with Kaspersky Security Center requires that the structure of subgroups in the Managed devices\Cloud subgroup matches the structure of cloud segments, enable the Create subgroups corresponding to containers of newly detected devices and Delete subgroups for which no match is found in the cloud segments options in the rule properties, and then enforce the rule.
- Device is in cloud segment
- In the Device discovered using API drop-down list, select one of the following values:
- AWS. The device is discovered by using the AWS API, that is, the device is definitely in the AWS cloud environment.
- Azure. The device is discovered by using the Azure API, that is, the device is definitely in the Azure cloud environment.
- Google Cloud. The device is discovered by using the Google API, that is, the device is definitely in the Google Cloud environment.
- No. The device cannot be detected by using the AWS, Azure, or Google API, that is, it is either outside the cloud environment or it is in the cloud environment but it cannot be detected by using an API.
- No value. This condition does not apply.If necessary, set up other rule properties in other sections.
- If necessary, enforce the rule by clicking the Force button in the lower part of the window.
The Rule Execution Wizard starts. Follow the instructions of the Wizard. When the Wizard finishes, the rule will be run and the structure of subgroups in the Managed devices\Cloud subgroup will match the structure of your cloud segments.
- Click the OK button.
The properties are set up and saved.
To disable the Synchronize with Cloud rule:
- In the console tree, right-click the name of the Device discovery node.
- In the context menu, select Properties.
- In the Properties window that opens, in the Sections pane, select Move devices.
- In the list of device moving rules in the workspace, disable (clear) the Synchronize with Cloud option and click OK.
The rule is disabled and will no longer be applied.
Using deployment scripts for deploying security applications
When Kaspersky Security Center is deployed in a cloud environment, you can use deployment scripts for automating the deployment of security applications. The deployment scripts for the Amazon Web Services, Microsoft Azure, and Google Cloud are available as ZIP files at the Kaspersky Support page.
You can deploy the latest versions of Kaspersky Endpoint Security for Linux and Kaspersky Security for Windows Server by using deployment scripts only if you already have created installation packages and management plug-ins for these programs. To deploy the latest versions of the security applications by using deployment scripts, perform the following on the Administration Server in the cloud environment:
- Run the Cloud Environment Configuration Wizard.
- Follow the instructions provided at https://support.kaspersky.com/14713.
Viewing the properties of cloud devices
To view the properties of a cloud device:
- In the console tree, in the Device discovery → Cloud node, select the subnode that corresponds to the group where the relevant instance is located.
If you are unaware of the group where the relevant virtual device is located, use the search function:
- Right-click the name of the Managed devices → Cloud node, and then select Search in the context menu.
- In the window that opens, perform a search.
If a device exists that meets the criteria that you set, its name and details will be displayed in the lower part of the window.
- Right-click the name of the relevant node. In the context menu, select Properties.
In the window that opens, the object properties are displayed.
The System Info → General system info section contains the properties that are specific for devices in cloud environment:
- Device discovered using API (AWS, Azure, or Google Cloud; if the device cannot be detected by using API tools, the No value is displayed).
- Cloud Region.
- Cloud VPC (for AWS and Google Cloud devices only).
- Cloud availability zone (for AWS and Google Cloud devices only).
- Cloud subnet.
- Cloud placement group (this unit is only displayed if the instance belongs to a placement group; otherwise, it is not displayed).
You can click the Export to file button to export this information to a .csv or .txt file.
Working in Amazon Web Services cloud environment
This section tells you how to prepare for working with Kaspersky Security Center in Amazon Web Services.
The addresses of web pages cited in this document are correct as of the Kaspersky Security Center release date.
About work in Amazon Web Services cloud environment
You can purchase Kaspersky Security Center at AWS Marketplace in the form of an Amazon Machine Image (AMI), which is a ready-to-use image of a preconfigured virtual machine. You can subscribe to a paid AMI or BYOL AMI and, based on that image, create an Amazon EC2 instance with Kaspersky Security Center Administration Server installed.
To work with the AWS platform and, in particular, to purchase apps at AWS Marketplace and create instances, you need an Amazon Web Services account. You can create a free account at https://aws.amazon.com. You can also use an existing Amazon account.
If you subscribed to an AMI available at AWS Marketplace, you receive an instance with your ready-to-use Kaspersky Security Center. You do not have to install the application yourself. In this case, Kaspersky Security Center Administration Server is installed on the instance without your involvement. After installation, you can start Administration Console and connect to Administration Server to begin working with Kaspersky Security Center.
To learn more about an AMI and how AWS Marketplace works, please visit the AWS Marketplace Help page. For more information about working with the AWS platform, using instances, and related concepts, please refer to the Amazon Web Services documentation.
The addresses of web pages cited in this document are correct as of the Kaspersky Security Center release date.
Creating IAM roles and IAM user accounts for Amazon EC2 instances
This section describes the actions that must be performed to ensure correct operation of the Administration Server. These actions include work with the AWS Identity and Access Management (IAM) roles and user accounts. Also described are the actions that must be taken on client devices to install Network Agent on them and then install Kaspersky Security for Windows Server and Kaspersky Endpoint Security for Linux.
Ensuring that the Kaspersky Security Center Administration Server has the permissions to work with AWS
The standards for operating in the Amazon Web Services cloud environment prescribe that a special IAM role be assigned to the Administration Server instance for working with AWS services. An IAM role is an IAM entity that defines the set of permissions for execution of requests to AWS services. The IAM role provides the permissions for cloud segment polling and installation of applications on instances.
After you create an IAM role and assign it to the Administration Server, you will be able to deploy protection of instances by using this role, without providing any additional information to Kaspersky Security Center.
However, it may be advisable to not create an IAM role for the Administration Server in the following cases:
- The devices whose protection you plan to manage are EC2 instances within the Amazon Web Services cloud environment but the Administration Server is outside of the environment.
- You plan to manage the protection of instances not only within your cloud segment but also within other cloud segments that were created under a different account in AWS. In this case, you will need an IAM role only for the protection of your cloud segment. An IAM role will not be needed to protect another cloud segment.
In these cases, instead of creating an IAM role you will need to create an IAM user account, that will be used by Kaspersky Security Center to work with AWS services. Before starting to work with the Administration Server, create an IAM user account with an AWS IAM access key (hereinafter also referred to as IAM access key).
Creation of an IAM role or IAM user account requires the AWS Management Console. To work with the AWS Management Console, you will need a user name and password from an account in AWS.
Creating an IAM role for the Administration Server
Before you deploy the Administration Server, in the AWS Management Console create an IAM role with permissions required for installation of applications on instances. For more details, see AWS Help sections about IAM roles.
To create an IAM role for the Administration Server:
- Open the AWS Management Console and log in under your AWS account.
- In the Roles section, create a role with the following permissions:
- AmazonEC2ReadOnlyAccess, if you plan to only run cloud segment polling and do not plan to install applications on EC2 instances using AWS API.
- AmazonEC2ReadOnlyAccess and AmazonSSMFullAccess, if you plan to run cloud segment polling and install applications on EC2 instances using AWS API. In this case, you will also need to assign an IAM role with the AmazonEC2RoleforSSM permission to the protected EC2 instances.
You will need to assign this role to the EC2 instance that you will use as the Administration Server.
The newly created role is available for all applications on the Administration Server. Therefore, any application running on the Administration Server has the capability to poll cloud segments or install applications on EC2 instances within a cloud segment.
The addresses of web pages cited in this document are correct as of the Kaspersky Security Center release date.
Creating an IAM user account for work with Kaspersky Security Center
An IAM user account is required for working with Kaspersky Security Center if the Administration Server has not been assigned an IAM role with permissions for device discovery and installation of applications on instances. The same account, or a different account, is also required for backing up the Administration Server data task if you use an S3 bucket. You can create one IAM user account with all the necessary permissions, or you can create two separate user accounts.
An IAM access key that you will need to provide to Kaspersky Security Center during initial configuration is automatically created for the IAM user. An IAM access key consists of an access key ID and a secret key. For more details about the IAM service, please refer to the following AWS reference pages:
- http://docs.aws.amazon.com/IAM/latest/UserGuide/introduction.html.
- http://docs.aws.amazon.com/IAM/latest/UserGuide/IAM_UseCases.html#UseCase_EC2.
To create an IAM user account with the necessary permissions:
- Open the AWS Management Console and sign in under your account.
- In the list of AWS services, select IAM (as shown in the figure below).
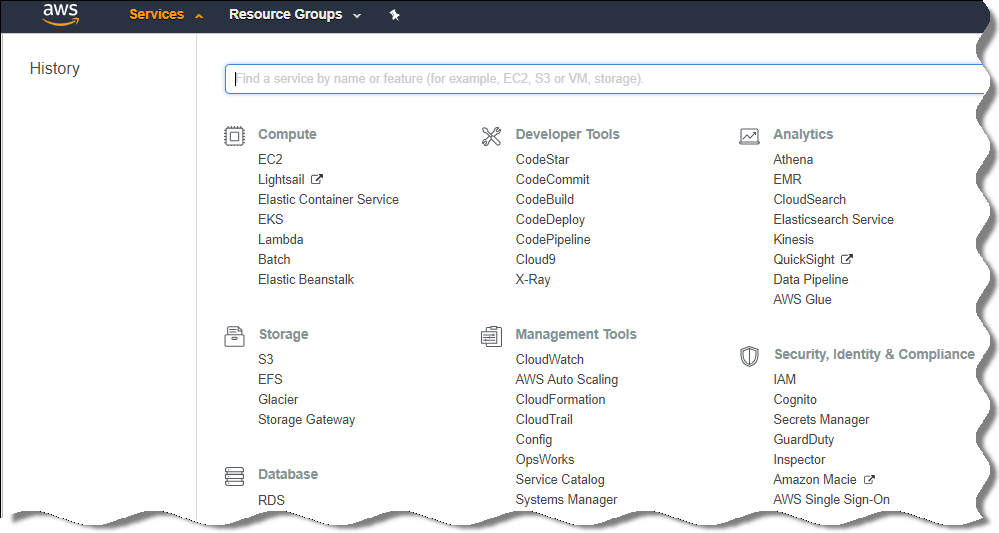
List of services in AWS Management Console
A window opens containing a list of user names and a menu that lets you work with the tool.
- Navigate through the areas of the console dealing with user accounts, and add a new user name or names.
- For the user(s) you add, specify the following AWS properties:
- Access type: Programmatic Access.
- Permissions boundary not set.
- Permissions:
- ReadOnlyAccess—If you plan to run only cloud segment polling and do not plan to install applications on EC2 instances using AWS API.
- ReadOnlyAccess and AmazonSSMFullAccess—If you plan to run cloud segment polling and install applications on EC2 instances using AWS API. In this case, you must assign an IAM role with the AmazonEC2RoleforSSM permission to the protected EC2 instances.
After you add permissions, view them for accuracy. In case of a mistaken selection, go back to the previous screen and make the selection again.
- After you create the user account, a table appears containing the IAM access key of the new IAM user. The access key ID is displayed in the Access key ID column. The secret key is displayed as asterisks in the Secret access key column. To view the secret key, click Show.
The newly created account is displayed in the list of IAM user accounts that corresponds to your account in AWS.
When deploying Kaspersky Security Center in a cloud segment, you must specify that you are using an IAM user account and provide the access key ID and secret access key to Kaspersky Security Center.
The addresses of web pages cited in this document are correct as of the Kaspersky Security Center release date.
Creating an IAM role for installation of applications on Amazon EC2 instances
Before you start protection deployment on EC2 instances by using Kaspersky Security Center, create in the AWS Management Console an IAM role with permissions required for installation of applications on instances. For more details, see AWS Help sections AWS Help about IAM roles.
The IAM role is required so that you can assign it to all EC2 instances on which you plan to install security applications by using Kaspersky Security Center. If you do not assign an instance the IAM role with the necessary permissions, installation of applications on this instance using AWS API tools will result in an error.
To work with the AWS Management Console, you will need a user name and password from an account in AWS.
To create an IAM role for installing applications on instances:
- Open the AWS Management Console and log in under your AWS account.
- In the menu on the left, select Roles.
- Click the Create Role button.
- In the list of services that appears, select EC2 and then in the Select Your Use Case list select EC2 again.
- Click the Next: Permissions button.
- In the list that opens, select the check box next to AmazonEC2RoleforSSM.
- Click the Next: Review button.
- Enter a name and a description for the IAM role and click the Create role button.
The role that you created appears in the list of roles with the name and description that you entered.
Hereinafter, you can use the newly created IAM role to create new EC2 instances that you intend to protect through Kaspersky Security Center, as well as associate it with existing instances.
The addresses of web pages cited in this document are correct as of the Kaspersky Security Center release date.
Working with Amazon RDS
This section describes which actions must be taken to prepare a database of Amazon Relational Database Service (RDS) for Kaspersky Security Center, place it in an option group, create an IAM role for working with an RDS database, prepare an S3 bucket for storage, and migrate an existing database to RDS.
Amazon RDS is a web service that helps AWS users to set up, operate, and scale a relational database in the AWS cloud environment. If you want, you can use an Amazon RDS database to work with Kaspersky Security Center.
You can work with the following databases:
- Microsoft SQL Server
- SQL Express Edition
- Aurora MySQL 5.7
- Standard MySQL 5.7
Creating an Amazon RDS instance
If you want to use Amazon RDS as the DBMS, you have to create an Amazon RDS database instance. This section describes how to select SQL Express Edition; if you want to work with Aurora MySQL 5.7 or Standard MySQL 5.7, you must select one of those engines.
To create an Amazon RDS database instance:
- Open the AWS Management Console at https://console.aws.amazon.com and sign in under your account.
- Using the AWS interface, create a database with the following settings:
- Engine: Microsoft SQL Server, SQL Express Edition
- DB engine version: SQL Server 2014 12.00.5546.0v1
- DB instance class: db.t2.medium
- Storage type: General purpose
- Allocated storage: minimum 50 GiB
- Security group: the same group where the EC2 instance with Kaspersky Security Center Administration Server will be located
Create an identifier, username and password for your RDS instance.
You may leave default settings in all the other fields. Or, change the default settings if you want to customize your Amazon RDS instance. To get help, refer to the AWS information pages.
- At the last step, AWS displays the results of the process. If you want to view the details of your Amazon RDS instance, click View DB instance details. If you want to proceed to the next action, start creating an option group for your Amazon RDS instance.
The creation of a new Amazon RDS instance may take up to several minutes. After the instance is created, you can use it for work with Kaspersky Security Center data.
The addresses of web pages cited in this document are correct as of the Kaspersky Security Center release date.
Creating option group for Amazon RDS instance
You need to place your Amazon RDS instance into an option group.
To create an option group for your Amazon RDS instance:
- Make sure that you are in the AWS Management Console (https://console.aws.amazon.com) and signed in under your account.
- In the menu line, click Services.
The list of available services appears (see figure below).
List of services in the AWS Management Console
- In the list, click RDS.
- In the left pane, click Option groups.
- Click the Create group button.
- Create an option group with the following settings, if you chose SQL Server at the stage of creating the Amazon RDS instance:
- Engine: SQLserver-ex
- Major engine version: 12.00
If you chose a different SQL database at the stage of creating the Amazon RDS instance, then choose a corresponding engine.
The group is created and displayed in the list of your groups.
After creating the option group, place your Amazon RDS instance into this option group.
The addresses of web pages cited in this document are correct as of the Kaspersky Security Center release date.
Modifying the option group
The default configuration of the option group in which you placed the Amazon RDS instance is not enough for working with the Kaspersky Security Center database. You have to add options to the option group and create a new IAM role for working with the database.
To modify the option group and create a new IAM role:
- Make sure that you are in the AWS Management Console (https://console.aws.amazon.com) and signed in under your account.
- In the menu line, click Services.
The list of available services appears (see figure below).
List of services in AWS Management Console
- In the list, select RDS.
- In the left pane, click Option groups.
The list of option groups is displayed.
- Select the option group in which you placed your Amazon RDS instance and click the Add option button.
The Add option window opens.
- In the IAM role section, select the Create a new role / Yes option and enter a name for the new IAM role.
The role is created with a default set of permissions. Later, you will have to change its permissions.
- In the S3 bucket section, do one of the following:
- If you haven't created an Amazon S3 bucket instance for the data backup, select the Create a new S3 bucket link and create a new S3 bucket, using the AWS interface.
- If you already have created an Amazon S3 bucket instance for the Administration Server data backup task, select your S3 bucket from the drop-down menu.
- Finish adding options by clicking the Add option button at the bottom of the page.
You have modified the option group and created a new IAM role for working with the RDS database.
The addresses of web pages cited in this document are correct as of the Kaspersky Security Center release date.
Modifying permissions for IAM role for Amazon RDS database instance
After you add options to the option group, you must assign required permissions to the IAM role that you created for working with the Amazon RDS database instance.
To assign required permissions to the IAM role that you created for work with the Amazon RDS database instance:
- Make sure that you are in the AWS Management Console (https://console.aws.amazon.com) and signed in under your account.
- In the list of services, select IAM.
A window opens containing a list of user names and a menu that lets you work with the tool.
- In the menu, select Roles.
- In the list of IAM roles displayed in the workspace, select the role that you created when adding option to the option group.
- Using the AWS interface, delete the sqlNativeBackup-<date> policy.
- Using the AWS interface, attach the AmazonS3FullAccess policy to the role.
The IAM role is assigned the required permissions to work with Amazon RDS.
The addresses of web pages cited in this document are correct as of the Kaspersky Security Center release date.
Preparing Amazon S3 bucket for database
If you plan to use Amazon Relational Database System (Amazon RDS) database, you have to create an Amazon Simple Storage Service (Amazon S3) bucket instance where the regular Backup of the database will be stored. For information about Amazon S3 and about S3 buckets, refer to the Amazon help pages. For more information about creating an Amazon S3 instance, refer to Amazon S3 help page.
To create an Amazon S3 bucket:
- Make sure that AWS Management Console is open and you are signed in under your account.
- In the list of AWS services, select S3.
- Navigate the console to create a bucket, following the instructions of the wizard.
- Select the same region where your Administration Server is located (or will be located).
- When the wizard finishes, make sure that the new bucket appears in the list of buckets.
A new S3 bucket is created and appears in your list of buckets. You have to specify this bucket when adding options to the option group. You will also have to specify the address of your S3 bucket to Kaspersky Security Center when the Kaspersky Security Center creates the Backup of Administration Server data task.
The addresses of web pages cited in this document are correct as of the Kaspersky Security Center release date.
Migrating the database to Amazon RDS
You can migrate your Kaspersky Security Center database from an on-premises device to an Amazon S3 instance that supports Amazon RDS. To do this, you need an S3 bucket for an RDS database and an IAM user account with AmazonS3FullAccess permission for this S3 bucket.
To perform the migration of the database:
- Make sure that you have created an RDS instance (refer to Amazon RDS reference pages for more information).
- On your physical Administration Server (on-premises), run the Kaspersky Backup utility to back up Administration Server data.
You must make sure that the file is named backup.zip.
- Copy the backup.zip file to the EC2 instance on which Administration Server is installed.
Make sure that you have enough disk space on the EC2 instance on which Administration Server is installed. In the AWS environment, you can add disk space to your instance to accommodate the process of database migration.
- On the AWS Administration Server, start the Kaspersky Backup utility again in interactive mode.
The Backup and Restore Wizard starts.
- At the Select action step, select Restore Administration Server data and click Next.
- At the Restore settings step, click the Browse button next to the Folder for storage of backup copies.
- In the Sign In to Online Storage window that opens, fill in the following fields and then click OK:
- Select the Migrate from local backup option. The Browse button becomes available.
- Click the Browse button to choose the folder on the AWS Administration Server where you copied the backup.zip file.
- Click Next and complete the procedure.
Your data will be restored to the RDS database using your S3 bucket. You can use this database for further work with Kaspersky Security Center in the AWS environment.
The addresses of web pages cited in this document are correct as of the Kaspersky Security Center release date.
Working in Google Cloud
This section provides information about work with Kaspersky Security Center in a cloud environment provided by Google.
Creating client email, project ID, and private key
You can use the Google API to work with Kaspersky Security Center in Google Cloud Platform. A Google account is required. Please refer to the Google documentation at https://cloud.google.com for more information.
You will need to create and provide Kaspersky Security Center with the following credentials:
Working with Google Cloud SQL for MySQL instance
You can create a database in Google Cloud and use this database for Kaspersky Security Center.
Kaspersky Security Center works with MySQL 5.7 and 5.6. Other versions of MySQL have not been tested.
To create and configure a MySQL database:
In your browser, go to https://cloud.google.com/sql/docs/mysql/create-instance#create-2nd-gen and follow the instructions provided.
When configuring a MySQL database, use the following flags:
- sort_buffer_size 10000000
- join_buffer_size 20000000
- innodb_lock_wait_timeout 300
- max_allowed_packet 32000000
- innodb_thread_concurrency 20
- max_connections 151
- tmp_table_size 67108864
- max_heap_table_size 67108864
- lower_case_table_names 1
Working in Microsoft Azure cloud environment
This section provides information about Kaspersky Security Center deployment and maintenance in a cloud environment provided by Microsoft Azure, as well as details of protection deployment on virtual machines in this cloud environment.
In a Kaspersky Security Center that has been deployed from a Usage-based monthly billed SKU, Vulnerability and Patch Management is automatically activated, and Mobile Device Management cannot be activated.
About work in Microsoft Azure
To work with the Microsoft Azure platform and, in particular, to purchase apps at the Azure Marketplace and create virtual machines, you will need an Azure subscription. Before you deploy the Administration Server, create an Azure Application ID with permissions required for installation of applications on virtual machines.
If you purchase a Kaspersky Security Center image at the Azure Marketplace, you can deploy a virtual machine with your ready-to-use Kaspersky Security Center Administration Server. You must select settings of the virtual machine, but you do not have to install the application yourself. After deployment, you can start Administration Console and connect to the Administration Server to begin working with Kaspersky Security Center.
You can also use an Azure virtual machine with Kaspersky Security Center Administration Server deployed on it to protect on-premises devices (for example, if a cloud server turns out to be easier to service and maintain than a physical one). If this is the case, you work with the Administration Server the same as you would if the Administration Server were installed on a physical device. If you do not plan to use Azure API tools, you do not need an Azure Application ID. In this case, an Azure subscription is enough.
Creating a subscription, Application ID, and password
To work with Kaspersky Security Center in the Microsoft Azure environment, you need an Azure subscription, Azure Application ID, and Azure Application password. You can use an existing subscription, if you already have one.
An Azure subscription grants its owner access to the Microsoft Azure Platform Management Portal and to Microsoft Azure services. The owner can use the Microsoft Azure Platform to manage services such as Azure SQL and Azure Storage.
To create a Microsoft Azure subscription,
Go to https://account.windowsazure.com/Subscriptions and follow the instructions there.
More information about creating a subscription is available on the Microsoft website. You will get a subscription ID, which you will later provide to Kaspersky Security Center together with Application ID and password.
To create and save Azure Application ID and password:
- Go to https://portal.azure.com and make sure that you are logged in.
- Following the instructions on the reference page, create your Application ID.
- Go to the Keys section of the application settings.
- In the Keys section, fill in the Description and Expires fields and leave the Value field empty.
- Click Save.
When you click Save, the system automatically fills the Value field with a long sequence of characters. This sequence is your Azure Application password (for example, yXyPOy6Tre9PYgP/j4XVyJCvepPHk2M/UYJ+QlfFvdU=). The description is displayed as you entered it.
- Copy the password and save it, so that you can later provide the Application ID and password to Kaspersky Security Center.
You can copy the password only when it has been created. Later, the password will no longer be displayed and you cannot restore it.
The addresses of web pages cited in this document are correct as of the Kaspersky Security Center release date.
Assigning a role to the Azure Application ID
If you only want to detect virtual machines using device discovery, your Azure Application ID must have the Reader role. If you want not only to detect virtual machines, but also to deploy protection on the virtual machines, your Azure Application ID must have the Virtual Machine Contributor role.
Follow the instructions on the Microsoft website to assign a role to your Azure Application ID.
Deploying Administration Server in Microsoft Azure and selecting database
To deploy Administration Server in the Microsoft Azure environment:
- Sign in to Microsoft Azure using your account.
- Go to the Azure portal.
- In the left pane, click the green plus sign.
- Type "Kaspersky Hybrid Cloud Security" in the search field in the menu.
Kaspersky Hybrid Cloud Security is a combination of Kaspersky Security Center and two security applications for protection of instances: Kaspersky Endpoint Security for Linux and Kaspersky Security for Windows Server.
- In the list of results, select Kaspersky Hybrid Cloud Security or Kaspersky Hybrid Cloud Security (BYOL).
In the right part of the screen, an information window appears.
- Read information and click the Create button in the end of the information window.
- Fill all the necessary fields. Use the tooltips to get information and assistance.
- When selecting the size, select one of the three starred options.
In most cases, 8 gigabytes (GB) of RAM is enough. However, in Azure, you can increase the size of RAM and other resources of the virtual machine at any time.
- When selecting a database, select one of the following, according to your plan:
- Local—If you want a database on the same virtual machine where the Administration Server will be deployed. Kaspersky Security Center comes with an SQL Server Express database. Choose this option if SQL Server Express is enough for your needs.
- New—If you want a new RDS database in the Azure environment. Choose this option if you want a DBMS other than SQL Server Express. Your data will be transferred to the cloud environment, where it will remain, and you will not have any extra expenses.
- Existing—If you want to use an existing database server. In this case, you will have to specify its location. If this server is outside the Azure environment, your data will be transferred over the internet, which might result in extra expenses.
- When entering the subscription ID, use the subscription that you created earlier.
After deployment, you can connect to the Administration Server using RDP. You can use the Administration Console to work with the Administration Server.
Working with Azure SQL
This section describes which actions must be taken to prepare a Microsoft Azure database for Kaspersky Security Center, prepare an Azure storage account, and migrate an existing database to Azure SQL.
SQL Database is a general-purpose relational database managed service in Microsoft Azure.
The addresses of web pages cited in this document are correct as of the Kaspersky Security Center release date.
Creating Azure storage account
You have to create a storage account in Microsoft Azure for working with Azure SQL database and for deployment scripts.
To create a storage account:
- Sign in to the Azure portal.
- In the left pane, select Storage accounts to proceed to the Storage accounts window.
- In the Storage accounts window, click the Add button to proceed to the Create storage account window.
- Fill in all the necessary fields to create a storage account:
- Location: must be the same as the location of the Administration Server.
- Other fields: you may leave the default values.
Use the tooltips to get information about each field.
After the storage account is created, the list of your storage accounts is displayed.
- In the list of your storage accounts, click the name of the newly created account to see information about this account.
- Make sure you know the account name, the resource group, and access keys for this storage account. You will need this information for working with Kaspersky Security Center.
You can refer to Azure website for help.
If you already have a storage account, you can use it for working with Kaspersky Security Center.
Creating Azure SQL database and SQL Server
You need an SQL database and SQL Server in the Azure environment.
To create an Azure SQL database and SQL Server:
- Follow the instructions on the Azure website.
You can create a new server when Microsoft Azure prompts you to do so; if you already have an Azure SQL Server, you can use it for Kaspersky Security Center rather than creating a new one.
- After creating the SQL database and SQL Server, make sure that you know its resource name and resource group:
- Go to https://portal.azure.com and make sure that you are logged in.
- In the left pane, select SQL databases.
- Click the name of a database from the list of your databases.
The properties window opens.
- The name of the database is the resource name. The name of the resource group is displayed in the Overview section of the properties window.
You need the resource name and resource group of the database for migrating the database to Azure SQL.
Migrating the database to Azure SQL
After Administration Server is deployed in the Azure environment, you can migrate your Kaspersky Security Center database from an on-premises device to Azure SQL. You need an Azure storage account for an Azure SQL database. You also must have Microsoft SQL Server Data-Tier Application Framework (DacFx) and SQLSysCLRTypes on your Administration Server.
To perform the migration of the database:
- Make sure that you have created an Azure storage account.
- Make sure that you have SQLSysCLRTypes and DacFx on your Administration Server.
You can download Microsoft SQL Server Data-Tier Application Framework (17.0.1 DacFx) and SQLSysCLRTypes (choose the version corresponding to the version of your SQL Server) from the official Microsoft website.
- On your physical Administration Server (on-premises), run the Kaspersky Backup utility to back up Administration Server data with the Migrate to Azure format option enabled.
- Copy the backup file to the Azure Administration Server.
Make sure that you have enough disk space on the Azure virtual machine where the Administration Server is installed. In the Azure environment, you can add disk space to your virtual machines to accommodate the process of database migration.
- On the Administration Server located in the Microsoft Azure environment, start the Kaspersky Backup utility again in interactive mode.
The Backup and Restore Wizard starts.
- At the Select action step, select Restore Administration Server data and click Next.
- At the Restore settings step, click the Browse button next to the Folder for storage of backup copies.
- In the Sign In to Online Storage window that opens, fill in the following fields and then click OK:
- Select the Migrate from local backup option.
The Browse button becomes available.
- Click the Browse button to choose the folder on the Azure Administration Server where you copied the backup file.
- Click Next and complete the procedure.
Your data will be restored to the Azure SQL database by using your Azure storage. You can use this database for further work with Kaspersky Security Center in the Azure environment.
The addresses of web pages cited in this document are correct as of the Kaspersky Security Center release date.