Contents
- Working in Amazon Web Services cloud environment
- About work in Amazon Web Services cloud environment
- Creating IAM roles and IAM user accounts for Amazon EC2 instances
- Ensuring that the Kaspersky Security Center Administration Server has the permissions to work with AWS
- Creating an IAM role for the Administration Server
- Creating an IAM user account for work with Kaspersky Security Center
- Creating an IAM role for installation of applications on Amazon EC2 instances
- Working with Amazon RDS
Working in Amazon Web Services cloud environment
This section tells you how to prepare for working with Kaspersky Security Center in Amazon Web Services.
The addresses of web pages cited in this document are correct as of the Kaspersky Security Center release date.
About work in Amazon Web Services cloud environment
You can purchase Kaspersky Security Center at AWS Marketplace in the form of an Amazon Machine Image (AMI), which is a ready-to-use image of a preconfigured virtual machine. You can subscribe to a paid AMI or BYOL AMI and, based on that image, create an Amazon EC2 instance with Kaspersky Security Center Administration Server installed.
To work with the AWS platform and, in particular, to purchase apps at AWS Marketplace and create instances, you need an Amazon Web Services account. You can create a free account at https://aws.amazon.com. You can also use an existing Amazon account.
If you subscribed to an AMI available at AWS Marketplace, you receive an instance with your ready-to-use Kaspersky Security Center. You do not have to install the application yourself. In this case, Kaspersky Security Center Administration Server is installed on the instance without your involvement. After installation, you can start Administration Console and connect to Administration Server to begin working with Kaspersky Security Center.
To learn more about an AMI and how AWS Marketplace works, please visit the AWS Marketplace Help page. For more information about working with the AWS platform, using instances, and related concepts, please refer to the Amazon Web Services documentation.
The addresses of web pages cited in this document are correct as of the Kaspersky Security Center release date.
Creating IAM roles and IAM user accounts for Amazon EC2 instances
This section describes the actions that must be performed to ensure correct operation of the Administration Server. These actions include work with the AWS Identity and Access Management (IAM) roles and user accounts. Also described are the actions that must be taken on client devices to install Network Agent on them and then install Kaspersky Security for Windows Server and Kaspersky Endpoint Security for Linux.
Ensuring that the Kaspersky Security Center Administration Server has the permissions to work with AWS
The standards for operating in the Amazon Web Services cloud environment prescribe that a special IAM role be assigned to the Administration Server instance for working with AWS services. An IAM role is an IAM entity that defines the set of permissions for execution of requests to AWS services. The IAM role provides the permissions for cloud segment polling and installation of applications on instances.
After you create an IAM role and assign it to the Administration Server, you will be able to deploy protection of instances by using this role, without providing any additional information to Kaspersky Security Center.
However, it may be advisable to not create an IAM role for the Administration Server in the following cases:
- The devices whose protection you plan to manage are EC2 instances within the Amazon Web Services cloud environment but the Administration Server is outside of the environment.
- You plan to manage the protection of instances not only within your cloud segment but also within other cloud segments that were created under a different account in AWS. In this case, you will need an IAM role only for the protection of your cloud segment. An IAM role will not be needed to protect another cloud segment.
In these cases, instead of creating an IAM role you will need to create an IAM user account, that will be used by Kaspersky Security Center to work with AWS services. Before starting to work with the Administration Server, create an IAM user account with an AWS IAM access key (hereinafter also referred to as IAM access key).
Creation of an IAM role or IAM user account requires the AWS Management Console. To work with the AWS Management Console, you will need a user name and password from an account in AWS.
Creating an IAM role for the Administration Server
Before you deploy the Administration Server, in the AWS Management Console create an IAM role with permissions required for installation of applications on instances. For more details, see AWS Help sections about IAM roles.
To create an IAM role for the Administration Server:
- Open the AWS Management Console and log in under your AWS account.
- In the Roles section, create a role with the following permissions:
- AmazonEC2ReadOnlyAccess, if you plan to only run cloud segment polling and do not plan to install applications on EC2 instances using AWS API.
- AmazonEC2ReadOnlyAccess and AmazonSSMFullAccess, if you plan to run cloud segment polling and install applications on EC2 instances using AWS API. In this case, you will also need to assign an IAM role with the AmazonEC2RoleforSSM permission to the protected EC2 instances.
You will need to assign this role to the EC2 instance that you will use as the Administration Server.
The newly created role is available for all applications on the Administration Server. Therefore, any application running on the Administration Server has the capability to poll cloud segments or install applications on EC2 instances within a cloud segment.
The addresses of web pages cited in this document are correct as of the Kaspersky Security Center release date.
Creating an IAM user account for work with Kaspersky Security Center
An IAM user account is required for working with Kaspersky Security Center if the Administration Server has not been assigned an IAM role with permissions for device discovery and installation of applications on instances. The same account, or a different account, is also required for backing up the Administration Server data task if you use an S3 bucket. You can create one IAM user account with all the necessary permissions, or you can create two separate user accounts.
An IAM access key that you will need to provide to Kaspersky Security Center during initial configuration is automatically created for the IAM user. An IAM access key consists of an access key ID and a secret key. For more details about the IAM service, please refer to the following AWS reference pages:
- http://docs.aws.amazon.com/IAM/latest/UserGuide/introduction.html.
- http://docs.aws.amazon.com/IAM/latest/UserGuide/IAM_UseCases.html#UseCase_EC2.
To create an IAM user account with the necessary permissions:
- Open the AWS Management Console and sign in under your account.
- In the list of AWS services, select IAM (as shown in the figure below).
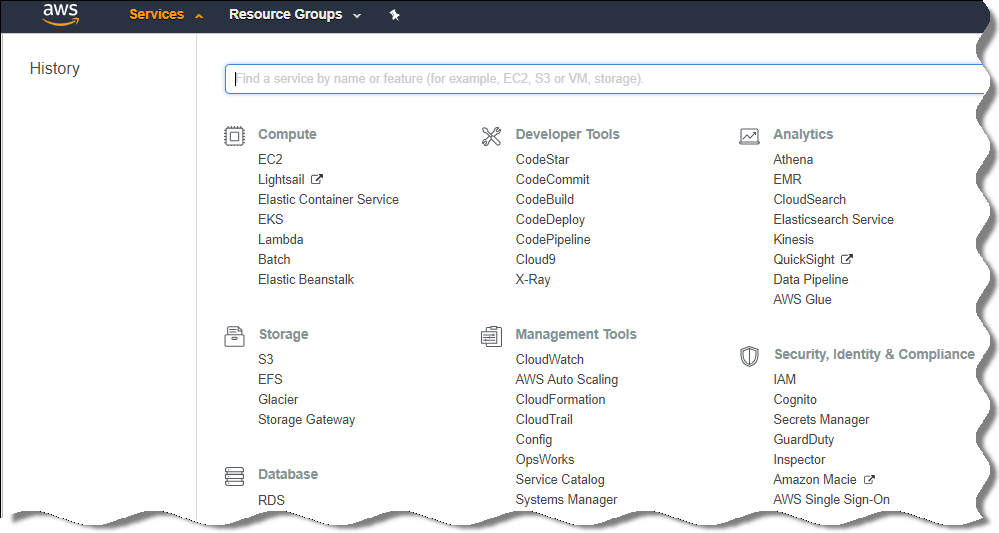
List of services in AWS Management Console
A window opens containing a list of user names and a menu that lets you work with the tool.
- Navigate through the areas of the console dealing with user accounts, and add a new user name or names.
- For the user(s) you add, specify the following AWS properties:
- Access type: Programmatic Access.
- Permissions boundary not set.
- Permissions:
- ReadOnlyAccess—If you plan to run only cloud segment polling and do not plan to install applications on EC2 instances using AWS API.
- ReadOnlyAccess and AmazonSSMFullAccess—If you plan to run cloud segment polling and install applications on EC2 instances using AWS API. In this case, you must assign an IAM role with the AmazonEC2RoleforSSM permission to the protected EC2 instances.
After you add permissions, view them for accuracy. In case of a mistaken selection, go back to the previous screen and make the selection again.
- After you create the user account, a table appears containing the IAM access key of the new IAM user. The access key ID is displayed in the Access key ID column. The secret key is displayed as asterisks in the Secret access key column. To view the secret key, click Show.
The newly created account is displayed in the list of IAM user accounts that corresponds to your account in AWS.
When deploying Kaspersky Security Center in a cloud segment, you must specify that you are using an IAM user account and provide the access key ID and secret access key to Kaspersky Security Center.
The addresses of web pages cited in this document are correct as of the Kaspersky Security Center release date.
Creating an IAM role for installation of applications on Amazon EC2 instances
Before you start protection deployment on EC2 instances by using Kaspersky Security Center, create in the AWS Management Console an IAM role with permissions required for installation of applications on instances. For more details, see AWS Help sections AWS Help about IAM roles.
The IAM role is required so that you can assign it to all EC2 instances on which you plan to install security applications by using Kaspersky Security Center. If you do not assign an instance the IAM role with the necessary permissions, installation of applications on this instance using AWS API tools will result in an error.
To work with the AWS Management Console, you will need a user name and password from an account in AWS.
To create an IAM role for installing applications on instances:
- Open the AWS Management Console and log in under your AWS account.
- In the menu on the left, select Roles.
- Click the Create Role button.
- In the list of services that appears, select EC2 and then in the Select Your Use Case list select EC2 again.
- Click the Next: Permissions button.
- In the list that opens, select the check box next to AmazonEC2RoleforSSM.
- Click the Next: Review button.
- Enter a name and a description for the IAM role and click the Create role button.
The role that you created appears in the list of roles with the name and description that you entered.
Hereinafter, you can use the newly created IAM role to create new EC2 instances that you intend to protect through Kaspersky Security Center, as well as associate it with existing instances.
The addresses of web pages cited in this document are correct as of the Kaspersky Security Center release date.
Working with Amazon RDS
This section describes which actions must be taken to prepare a database of Amazon Relational Database Service (RDS) for Kaspersky Security Center, place it in an option group, create an IAM role for working with an RDS database, prepare an S3 bucket for storage, and migrate an existing database to RDS.
Amazon RDS is a web service that helps AWS users to set up, operate, and scale a relational database in the AWS cloud environment. If you want, you can use an Amazon RDS database to work with Kaspersky Security Center.
You can work with the following databases:
- Microsoft SQL Server
- SQL Express Edition
- Aurora MySQL 5.7
- Standard MySQL 5.7
Creating an Amazon RDS instance
If you want to use Amazon RDS as the DBMS, you have to create an Amazon RDS database instance. This section describes how to select SQL Express Edition; if you want to work with Aurora MySQL 5.7 or Standard MySQL 5.7, you must select one of those engines.
To create an Amazon RDS database instance:
- Open the AWS Management Console at https://console.aws.amazon.com and sign in under your account.
- Using the AWS interface, create a database with the following settings:
- Engine: Microsoft SQL Server, SQL Express Edition
- DB engine version: SQL Server 2014 12.00.5546.0v1
- DB instance class: db.t2.medium
- Storage type: General purpose
- Allocated storage: minimum 50 GiB
- Security group: the same group where the EC2 instance with Kaspersky Security Center Administration Server will be located
Create an identifier, username and password for your RDS instance.
You may leave default settings in all the other fields. Or, change the default settings if you want to customize your Amazon RDS instance. To get help, refer to the AWS information pages.
- At the last step, AWS displays the results of the process. If you want to view the details of your Amazon RDS instance, click View DB instance details. If you want to proceed to the next action, start creating an option group for your Amazon RDS instance.
The creation of a new Amazon RDS instance may take up to several minutes. After the instance is created, you can use it for work with Kaspersky Security Center data.
The addresses of web pages cited in this document are correct as of the Kaspersky Security Center release date.
Creating option group for Amazon RDS instance
You need to place your Amazon RDS instance into an option group.
To create an option group for your Amazon RDS instance:
- Make sure that you are in the AWS Management Console (https://console.aws.amazon.com) and signed in under your account.
- In the menu line, click Services.
The list of available services appears (see figure below).
List of services in the AWS Management Console
- In the list, click RDS.
- In the left pane, click Option groups.
- Click the Create group button.
- Create an option group with the following settings, if you chose SQL Server at the stage of creating the Amazon RDS instance:
- Engine: SQLserver-ex
- Major engine version: 12.00
If you chose a different SQL database at the stage of creating the Amazon RDS instance, then choose a corresponding engine.
The group is created and displayed in the list of your groups.
After creating the option group, place your Amazon RDS instance into this option group.
The addresses of web pages cited in this document are correct as of the Kaspersky Security Center release date.
Modifying the option group
The default configuration of the option group in which you placed the Amazon RDS instance is not enough for working with the Kaspersky Security Center database. You have to add options to the option group and create a new IAM role for working with the database.
To modify the option group and create a new IAM role:
- Make sure that you are in the AWS Management Console (https://console.aws.amazon.com) and signed in under your account.
- In the menu line, click Services.
The list of available services appears (see figure below).
List of services in AWS Management Console
- In the list, select RDS.
- In the left pane, click Option groups.
The list of option groups is displayed.
- Select the option group in which you placed your Amazon RDS instance and click the Add option button.
The Add option window opens.
- In the IAM role section, select the Create a new role / Yes option and enter a name for the new IAM role.
The role is created with a default set of permissions. Later, you will have to change its permissions.
- In the S3 bucket section, do one of the following:
- If you haven't created an Amazon S3 bucket instance for the data backup, select the Create a new S3 bucket link and create a new S3 bucket, using the AWS interface.
- If you already have created an Amazon S3 bucket instance for the Administration Server data backup task, select your S3 bucket from the drop-down menu.
- Finish adding options by clicking the Add option button at the bottom of the page.
You have modified the option group and created a new IAM role for working with the RDS database.
The addresses of web pages cited in this document are correct as of the Kaspersky Security Center release date.
Modifying permissions for IAM role for Amazon RDS database instance
After you add options to the option group, you must assign required permissions to the IAM role that you created for working with the Amazon RDS database instance.
To assign required permissions to the IAM role that you created for work with the Amazon RDS database instance:
- Make sure that you are in the AWS Management Console (https://console.aws.amazon.com) and signed in under your account.
- In the list of services, select IAM.
A window opens containing a list of user names and a menu that lets you work with the tool.
- In the menu, select Roles.
- In the list of IAM roles displayed in the workspace, select the role that you created when adding option to the option group.
- Using the AWS interface, delete the sqlNativeBackup-<date> policy.
- Using the AWS interface, attach the AmazonS3FullAccess policy to the role.
The IAM role is assigned the required permissions to work with Amazon RDS.
The addresses of web pages cited in this document are correct as of the Kaspersky Security Center release date.
Preparing Amazon S3 bucket for database
If you plan to use Amazon Relational Database System (Amazon RDS) database, you have to create an Amazon Simple Storage Service (Amazon S3) bucket instance where the regular Backup of the database will be stored. For information about Amazon S3 and about S3 buckets, refer to the Amazon help pages. For more information about creating an Amazon S3 instance, refer to Amazon S3 help page.
To create an Amazon S3 bucket:
- Make sure that AWS Management Console is open and you are signed in under your account.
- In the list of AWS services, select S3.
- Navigate the console to create a bucket, following the instructions of the wizard.
- Select the same region where your Administration Server is located (or will be located).
- When the wizard finishes, make sure that the new bucket appears in the list of buckets.
A new S3 bucket is created and appears in your list of buckets. You have to specify this bucket when adding options to the option group. You will also have to specify the address of your S3 bucket to Kaspersky Security Center when the Kaspersky Security Center creates the Backup of Administration Server data task.
The addresses of web pages cited in this document are correct as of the Kaspersky Security Center release date.
Migrating the database to Amazon RDS
You can migrate your Kaspersky Security Center database from an on-premises device to an Amazon S3 instance that supports Amazon RDS. To do this, you need an S3 bucket for an RDS database and an IAM user account with AmazonS3FullAccess permission for this S3 bucket.
To perform the migration of the database:
- Make sure that you have created an RDS instance (refer to Amazon RDS reference pages for more information).
- On your physical Administration Server (on-premises), run the Kaspersky Backup utility to back up Administration Server data.
You must make sure that the file is named backup.zip.
- Copy the backup.zip file to the EC2 instance on which Administration Server is installed.
Make sure that you have enough disk space on the EC2 instance on which Administration Server is installed. In the AWS environment, you can add disk space to your instance to accommodate the process of database migration.
- On the AWS Administration Server, start the Kaspersky Backup utility again in interactive mode.
The Backup and Restore Wizard starts.
- At the Select action step, select Restore Administration Server data and click Next.
- At the Restore settings step, click the Browse button next to the Folder for storage of backup copies.
- In the Sign In to Online Storage window that opens, fill in the following fields and then click OK:
- Select the Migrate from local backup option. The Browse button becomes available.
- Click the Browse button to choose the folder on the AWS Administration Server where you copied the backup.zip file.
- Click Next and complete the procedure.
Your data will be restored to the RDS database using your S3 bucket. You can use this database for further work with Kaspersky Security Center in the AWS environment.
The addresses of web pages cited in this document are correct as of the Kaspersky Security Center release date.